Learning Objective
After completing this lesson, you will be able to:
- explain how a pico is a first-class Internet citizen
- explain channels and use the "My Picos" page to manage them
- send events and queries to a pico using a browser, the event console, and the "Testing" tab
- use logs
- use the klog() operator
Prerequisites
- complete the Pico Engine Quickstart
- have a ruleset registered, installed in the pico-engine, and added to a pico
- have installed the event console in Google Chrome
Pico as an Internet citizen
A pico (quoting from Rebuilding KRL):
...
The pico has multiple URL's that can be used to query its state and send it events. HTTP is used as the transport protocol.
events
Here is a sample URL that sends an event to a pico like the one you created in the Pico Engine Quickstart:
...
- "http://" identifies HTTP as the protocol
- "localhost:8084" is the domain name and port of the pico-engine which hosts the pico
- "sky/event" identifies this as an event for the pico
- "citdel5gz00012aaoo5ucc613" is the pico's event channel identifier (ECI)
- "5" is an arbitrary string which serves as an event identifier (EID)
- "echo" identifies the domain of the event
- "hello" identifies the type of the event
queries
Here is a sample URL that sends a query to the Pico:
...
- "sky/cloud" identifies this as a query for the pico
- "hello_world" is the ruleset name
- "hello" is the name of a shared function from that ruleset
- "obj" is the name of the argument that the function expects
- "Bob" is the value for that argument
Create a Channel
As you can see in the URL for events and queries, channels are the way in which a pico can be identified by the pico-engine.
...
Congratulations! You have created your first channel.
Sending events through the channel
Since a pico is a first-class Internet citizen, there are many ways in which you can send it an event.
Directly using a URL
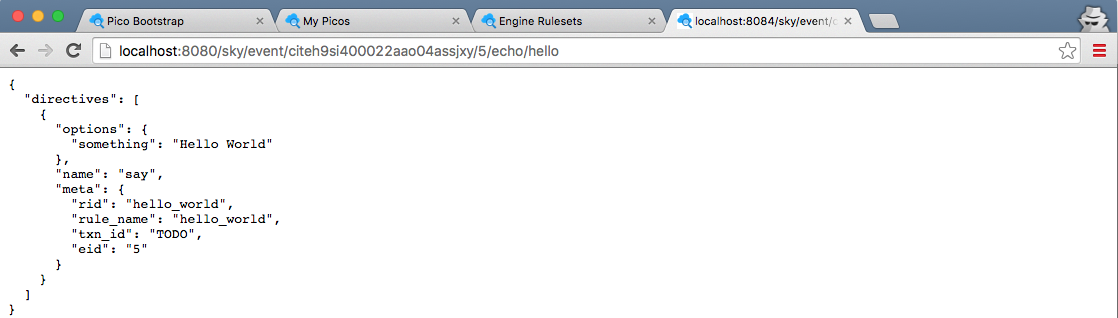
Construct a URL that identifies your Pico by the channel id that you created in the previous section. Remember to replace the channel identifier in the sample URL with the identifier of your "lesson" channel. Also, you may choose your own event identifier (rather than use "5").
...
The result will look something like this:
Using the event console
to do
Using the "Testing" tab
While developing a ruleset, you can use the "My Picos" page which can provide a simple UI for your event. To do so, you must modify the ruleset to define and share the name __testing and bind it to a structure which represents the events and queries you wish to test.
...
Notice the button "echo/hello", representing this event for your ruleset named "hello_world". Click on this button to send the event.

Using logs
Look at the console from which you started your pico-engine.
...
For example, try a typo in the URL for the event, say by spelling "echo" incorrectly as "ecco". In the console log, you will see that the event is recieved, and the Pico selected (based on its ECI), but you will not see that the event has fired.
Send a query through your channel
Create a URL for your Pico which uses your "lesson" channel identifier. It will look something like
...
Congratulations! You know how to send queries to a pico, either directly using a URL, or through the UI.
More about logs
KRL provides an operator, klog(), which allows us to print information into the log file. It is an operator, rather than a statement, so it is applied to an expression. It prints into the log the message passed to it as an argument, followed by the value of the expression on which it operates.
...
| Code Block |
|---|
[DEBUG] { rid: undefined,
  event:
   { eci: 'ciu4b6zui0001jfs0nmki6z1y',
     eid: '5',
     domain: 'echo',
     type: 'hello' } } rule selected: hello_world -> hello_world
[KLOG] our passed in name:  Bob
[DEBUG] { rid: 'hello_world',
  event:
   { eci: 'citeh9si400022aao04assjxy',
     eid: '5',
     domain: 'echo',
type: 'hello' } } fired |
Congratulations!
You now know how to send events to, and make queries of, a pico. You have also learned some debugging techniques.
Next, learn about persistence, the "P" of pico, by working through Lesson 2. Pico stateState.