...
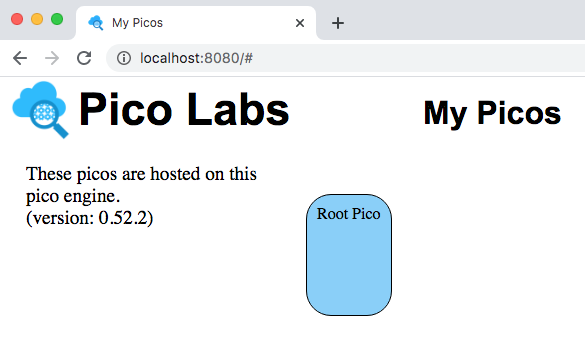
Your owner pico is represented by a rounded rectangle, which is placed on a canvas, allowing you to change its placement. Keep this tab open for use in registering and installing your ruleset, below.
Writing KRL
Do the following:
- Create a
gitrepo for your KRL rulesets and put it on Github. You can create a different repo for each ruleset if you like or create one repo and put multiple rulesets in it. Create file a file in your ruleset repo called
hello_world.krland put the code below into it.- Validate (parse) your ruleset using the "Engine Rulesets" pageone of the methods in Developer Tips for Pico Engine.
- Check your validated ruleset into Github.
A first ruleset, in a file named hello_world.krl:
| Code Block | ||
|---|---|---|
| ||
ruleset hello_world {
  meta {
    name "Hello World"
    description <<
A first ruleset for the Quickstart
>>
    author "Phil Windley"
    logging on
    shares hello
  }

  global {
    hello = function(obj) {
      msg = "Hello " + obj;
      msg
    }
  }

  rule hello_world {
    select when echo hello
    send_directive("say") with
      something = "Hello World"
  }

} |
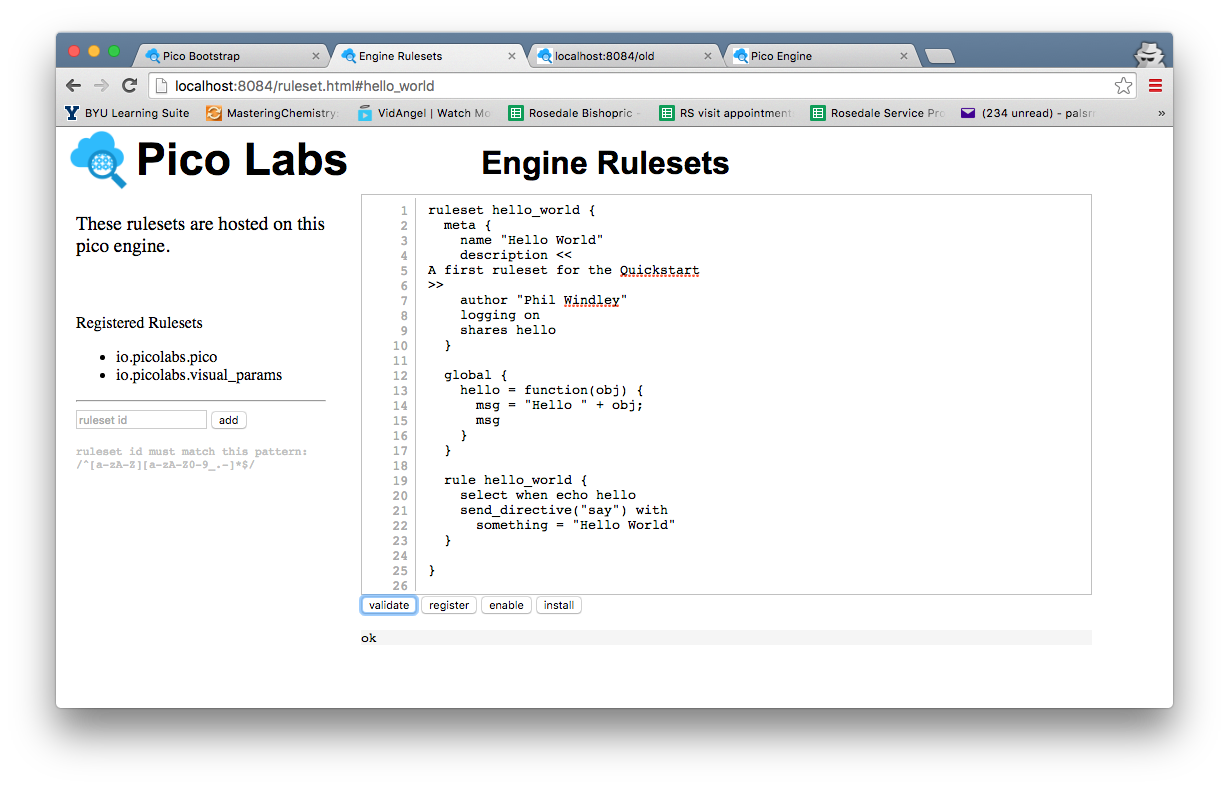
To validate, open the "Engine Rulesets" page (linked from the "Pico Bootstrap" page), and paste the ruleset above into the big text area, and click the "validate" button. When your KRL compiles correctly, you will see a result of "ok" beneath the buttons, with the page looking like this screenshot.
| Info |
|---|
Hint: The editor in the "Engine Rulesets" page is very primitive and does not include a "save to disk" option. You should also save your ruleset somewhere in your file system (or in a repository), named, say "hello_world.krl" |
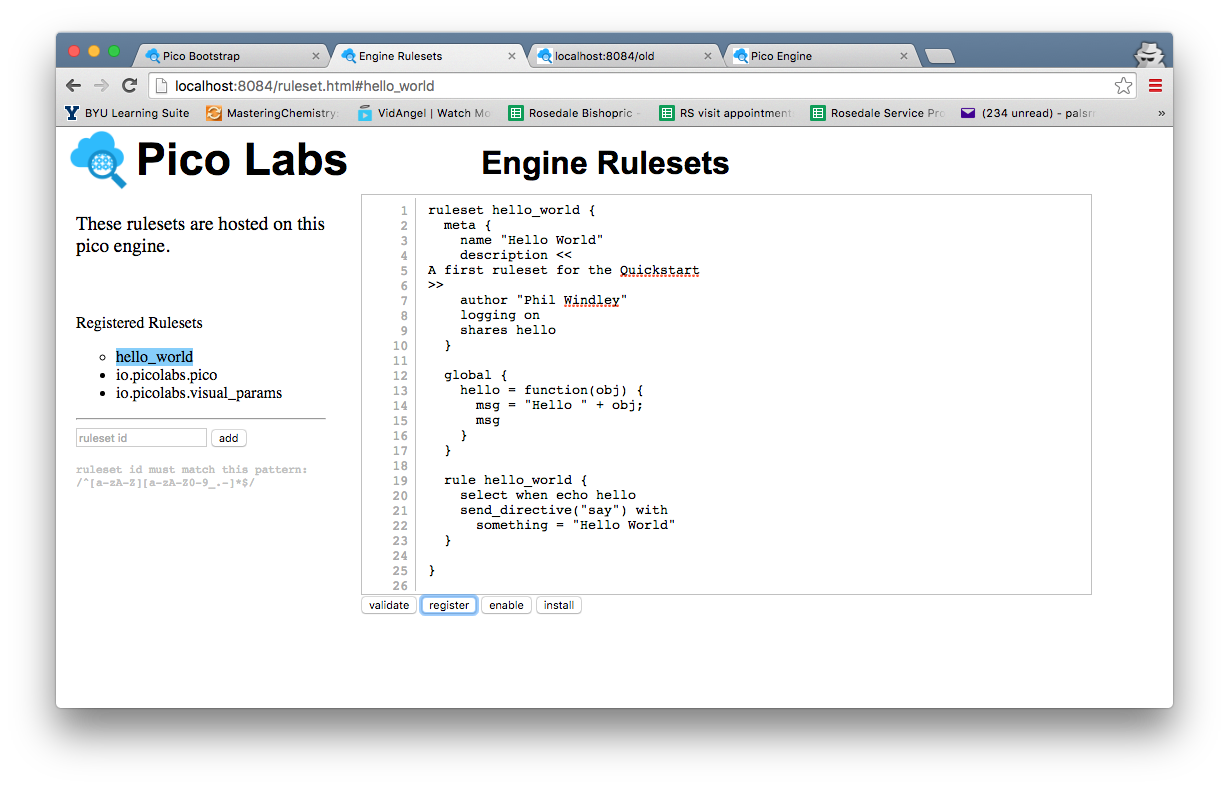
Click on the "register" button, and then your page will look like this screenshot.
Your ruleset is now registered with the node pico-engine, and its name is highlighted in the list of registered rulesets. Notice the circle beside the ruleset name. This indicates that the source code has been registered with the pico-engine, but is not yet enabled. Click on the "enable" button to take care of this.
Finally, click on the "install" button. This causes the pico-engine to compile the KRL and cache the compiled version in a rulesets folder. Once this has been done, the ruleset can be added to picos.
Adding the Ruleset to your pico
So far, you have installed the ruleset into your pico-engine. But it can't run unless it has been added to a pico.
Adding Overall Structure of a KRL Ruleset
A ruleset is enclosed by the "ruleset" keyword, the ruleset identifier or RID, and curly braces, as shown above in lines 1 and 25. In this case, the RID is "hello_world".
A ruleset usually contains a "meta" block giving information about the ruleset and any names which it "shares" with the outside world (including other rulesets). Lines 2-10.
A ruleset usually contains a "global" block which binds values to names, some of which may be shared. Lines 12-17. In this case, the name "hello" is bound to a function value and is shared.
A ruleset usually contains one or more rules. Lines 19-23. In this case there is one rule named "hello_world" which will be watching for events with domain "echo" and type "hello".
Registering and Installing Your Ruleset
Registering a ruleset means to make it available to the pico engine, which compiles the KRL source code into JavaScript and caches this as a node module.
Installing a ruleset to a pico is properly a a user function function, but as a developer, you are functioning in both user and developer capacities.
View your Owner Pico by visiting the "My Picos" page (linked from the "Pico Bootstrap" page).
Your owner pico is represented by a rounded rectangle, which is placed on a canvas, allowing you to change its placement.
Click , as shown above.
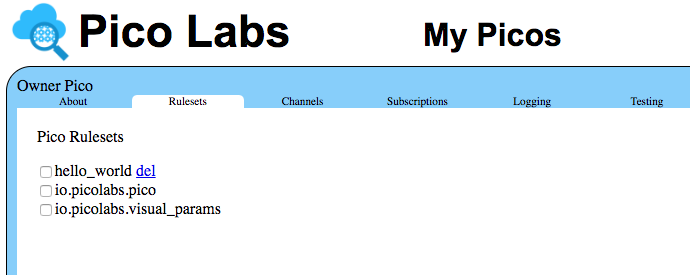
Single click on the rounded rectangle , on which represents your Owner Pico. It expands opens up, giving you access to information about it.
...
The "About" tab will be used in subsequent lessons.
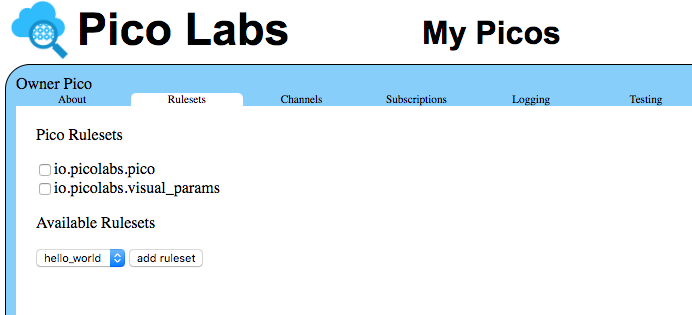
Click Now, click on the "Rulesets" tab.
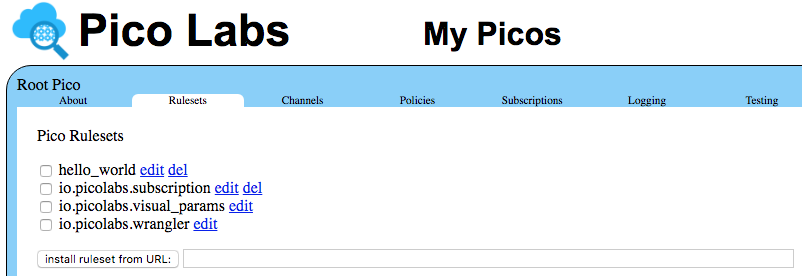
Notice that the name of your ruleset is mentioned in a drop-down list of available rulesets. Click the "add ruleset" button to add the ruleset to your pico.
Enter the URL to the KRL source code in the box beside the button "install ruleset from URL" and click on that button.
| Info |
|---|
A Github raw URL returns the file without any Github page chrome. For example, this is a raw and cooked example of the same ruleset. |
Clicking on the "install ruleset from URL" will send an event to your pico. This event is captured by rules in the "io.picolabs.pico" ruleset, which will cause the pico engine to get your ruleset from the Internet, compile it, and register it.
Finally, the ruleset will be installed in this pico, as you can see when the page refreshes.
Notice that you are allowed to delete delete from the ruleset from the picopico any ruleset that you install.
Next Steps
Having completed this quickstart, you should continue with Lesson 1. Events and Queries
...
