...
- Enter your root pico's testing tab, find the io.picolabs.oauth_server, click it's checkbox to open up a form submission which will request the following:
- client_id: any arbitrary string
- client_name: any arbitrary string
- redirect_uri: "http://localhost:3000/#/code" (This is the default location. Your Manifold may be running from a different one.)
- client_uri: (OPTIONAL) any arbitrary string
- client_img: (OPTIONAL) any image url, this will be used to identify the manifold application.
- client_rids: "io.picolabs.manifold_owner"
- Press the oauth/register button
- Refresh the browser page, this will update the pico engine's information. Enter the Ruleset tab of your root pico. Click the checkbox for the io.picolabs.oauth_server. This will reveal the information recently submitted in addition to a randomly generated client_secret as seen below. Copy this specific string to clipboard.
 Logging into Manifold
In a separate tab, open the manifold page (by default address: localhost:3000/#/login)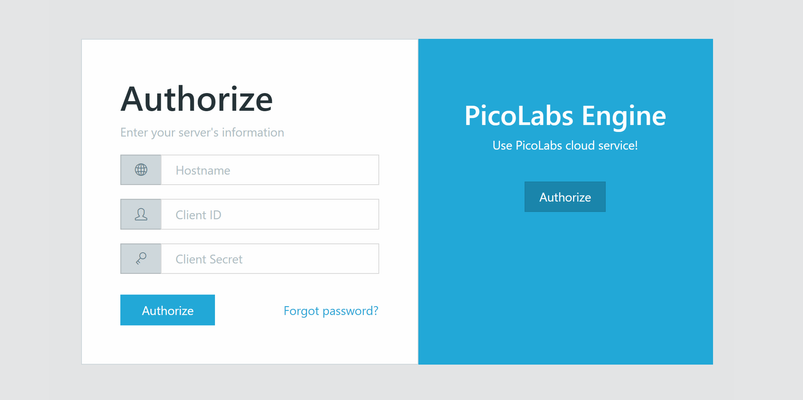
- Enter these fields:
- Hostname: localhost:8080 (or wherever the pico engine is running from)
- Client ID: what you had previously entered in the root pico.
- Client Secret: Whatever your secret was (should be in your clipboard)
- Authorize, this should redirect you to a login page on your pico engine requesting an "Owner ID". This can be the default ("root"/"toor") or what you created earlier.
- Upon submitting you should see the page refresh with an approve/deny page and your client_img. Approve.
- You should be redirected to a dashboard with several graphs. These are all boilerplate.
...