There are a few things that will make managing your pico engine and writing KRL code easier.
| Table of Contents | ||
|---|---|---|
|
Managing your Pico Engine
If you need to remove your pico engine and/or change to a different version, follow these instructions.
Installation
To install and run the pico engine:
| Code Block |
|---|
$ npm install -g pico-engine
$ pico-engine |
Install a Specific Version
Install a specific version of the pico engine code. In this example, we're asking for the engine at version 1.0.0:
| Code Block |
|---|
npm install -g pico-engine@1.0.0 |
Update to the Latest Version
You also use the npm install command to get the latest version, or the variant shown above if you want a specific version rather than the latest, using the command:
| Code Block |
|---|
npm install -g pico-engine |
Check Your Version
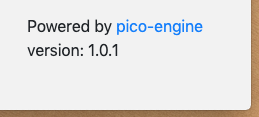
You can see which version you are using near the bottom-right corner of the developer UI page (localhost:3000):
or by running the command:
| Code Block |
|---|
npm ls -g pico-engine |
or using the --version flag:
| Code Block |
|---|
pico-engine --version |
Remove Pico Engine
Remove the pico engine code.
| Code Block |
|---|
npm rm -g pico-engine |
Initialize all picos
If you wish to remove all picos and start over, use one or more of these commands
...
:
| Code Block |
|---|
rm -r ~/.pico-engine/db #removes all picos |
...
rm -r ~/.pico-engine/rulesets-db #removes the relationship between URLs and rulesets rm -r ~/.pico-engine/rulesets #removes compiled |
...
rulesets (node modules) rm -r ~/.pico-engine #shortcut to do |
...
all of the above |
...
Remove the pico engine code.
| Code Block |
|---|
npm rm -g pico-engine |
...
Install a specific version of the pico engine code. In this example, the engine as of March 28, 2017 was at version 0.5.13.
| Code Block |
|---|
npm install -g pico-engine@0.5.13 |
...
You can update to the latest version using the command
| Code Block |
|---|
npm update -g pico-engine |
You can see which version you are using near the top-left corner of the "My Picos" page (localhost:8080) or by running the command
...
Note that these commands assume your PICO_ENGINE_HOME has been left at the default value, which is ~/.pico-engine. Change them accordingly if you set your home elsewhere.
| Warning | ||
|---|---|---|
| ||
Removing these folders cannot be undone! If you remove you picos, they will be gone. Removing the compiled rulesets will be undone if you simply install them again. |
Finding your IP address
By default, your pico engine will set its base URL as http://localhost:3000 and use this as its host, available from KRL code as meta:host.
Instead of using localhost, you could use the local IP address of your machine. Discovery of this IP address depends on your operation system.
If you are running your engine locally, then this IP address will be the private IP address given to you by your router, and will not be globally available on the Internet. However, other machines or devices on the same router/subnet will be able to find your engine using this IP address.
If you are running your engine on a cloud service such as Amazon's EC2 services, then this IP address will be globally available.
| Warning |
|---|
Switching to a different wifi or router will change your IP address, but the engine will use whatever address it found when it was booted up, NOT your current IP address. Restart your engine to use the new IP address. |
Configuring your default base URL
You have the option to configure your pico engine's host on startup like this:
| Code Block |
|---|
PICO_ENGINE_BASE_URL=http://localhost:3000 pico-engine |
This is particularly useful if you expect to develop locally and jump between WiFis without wanting to restart your engine. This is also useful if you want to set the host to a domain name (like http://www.picolabs.io) instead of an IP address.
Using the pico engine with WSL
WSL 2 is a Linux virtualization environment for Windows. WSL is a great way to run the pico engine on Windows. There can be some problem bridging ports between Windows and the virtualized Linux environment. Rogerio Cruz has written a PowerShell script that allows you to bridge ports between your WSL 2 environment and Windows host.
Working with More than One Image
By default the pico engine stores the state of the engine, including logs and compiled KRL, in the ~/.pico-engine/rulesets directory. You can change this to a different directory by setting the PICO_ENGINE_HOME environment variable.
Because the pico engine manages the state of all the picos running in it, this directory and its contents represent an image of the current state of all the picos in the engine at any given time.
By changing the PICO_ENGINE_HOME environment variable, you can keep different development environments or projects separate from each other, and go back to the place you left off in a particular pico application.
For example, you could have a different pico engine image for a game project and an IoT project and start up the pico engine in either environment like so:
| Code Block | ||||
|---|---|---|---|---|
| ||||
# work on my game project PICO_ENGINE_HOME=~/.dnd_game_image pico-engine # work on IoT project PICO_ENGINE_HOME=~/.iot_image pico-engine |
Running multiple pico engines
To run multiple pico engines on the same host simultaneously, you will need to assign each instance of the engine a different port and a different folder directory for its database and ruleset cacheimage state. For example, while running a pico engine listening on the default port, and using the default location for its database, you could start an additional instance with a command like this one:
| Code Block |
|---|
PORT=80813001 PICO_ENGINE_HOME=~/.pico-engine-1 pico-engine |
Using Docker
The pico engine repository contains a Dockerfile that can be used to build a Docker image for use locally or in a cloud service like AWS Fargate.
To build a container use docker build:
| Code Block |
|---|
docker build -t <username>/<container-name> github.com/picolab/pico-engine |
For example:
| Code Block |
|---|
docker build -t pjw/pico-engine github.com/picolab/pico-engine |
builds a container named pjw/pico-engine for your use.
To run the image use docker run:
| Code Block |
|---|
docker run -p <port>:3000 -v <mount-point>:/var/pico-image -d <username>/container-name> |
For example:
| Code Block |
|---|
docker run -p 3001:3000 -v ~/images/pico-image:/var/pico-image -d pjw/pico-engine |
runs the docker with a port of 3001 and the image files located at ~/images/pico-image on the local machine.
If you need to set the URL for your engine, you can add the PICO_ENGINE_BASE_URL env variable. For example:
| Code Block |
|---|
docker run -p 443:3000 -v ~/images/pico-image:/var/pico-image -d pjw/pico-engine -e PICO_ENGINE_BASE_URL=https://picos.picolabs.io |
would use https://picos.picolabs.io as the engine URL.
You can run the same container multiple times with different ports and mount points to have multiple engines running at the same time.
| Code Block |
|---|
docker run -p 3000:3000 -v ~/images/dnd_game_image:/var/pico-image -d pjw/pico-engine
docker run -p 3001:3000 -v ~/images/iot_image:/var/pico-image -d pjw/pico-engine |
would run two different pico engines, each with their own collection of picos, one on port 3000 and one on port 3001.
Hosting Code
Because the rules engine reads your KRL program from the Web, it has to be available online. You can host it anywhere, but Github works especially well. There are a few options:
- GitHub works well, with one caveat. See these instructions for more information about how to use
...
- GitHub to host KRL. The caveat is that GitHub caches the resources on raw URLs for about 5 minutes. If you're making frequent changes, it can be frustrating to wait out the cache. Alternatively, GitLab should give you fewer caching problems. (raw URLs to rulesets in private repositories need an account access token)
- AWS S3 works well. Be sure to make the URL for the ruleset is readable by the engine.
The pico engine compiles your KRL into a Node.js module, which it stores in a folder at within the ~/.pico-engine/rulesets. (Node.js is a trademark of Joyent, Inc. and is used with its permission. We are not endorsed by or affiliated with Joyent.) folder (or the folder specified by PICO_ENGINE_HOME).
Flushing the Ruleset
Wherever you host your code, the rules pico-engine caches it after parsing compiling it for better performance. That means that you need to flush your code from the rules engine cache whenever you update it. After pushing a change to your ruleset, you will need to instruct the pico-engine to retrieve the source code again and re-compile it.
Manual flush
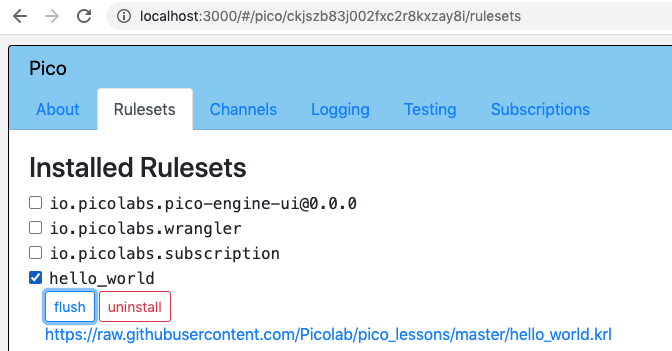
Using the developer UI, select the RID in the "Rulesets" tab, and click on the "flush" button:
Flush from your program
Use the wrangler API in the postlude of a rule:
| Code Block | ||
|---|---|---|
| ||
raise wrangler event "rulesets_need_flushing" |
which will check the URL for all of the rules installed in your pico and flush those that have changed. When wrangler has completed the operation, it will raise the wrangler:rulesets_flushed event, with no attributes.
Flush with a URL
Use a URL like this one, from a browser, from Postman, or with a curl command:
| Code Block |
|---|
http://localhost:80803000/api/ruleset/flush/flush?url=https://raw.githubusercontent.com/Picolab/pico_lessons/master/hello_world.krl |
You will need to give the correct domain and port for your pico engine, and mention at provide the end the RID of your ruleset. In the example above, the RID is hello_world. You may also flush the ruleset by going to the Rulesets tab, deleting the ruleset from your pico, and entering its URL and clicking on the "install ruleset from URL:" button.URL of the KRL source file you want to flush. This is the same as the URL which installed the ruleset.
| Info |
|---|
Note: the engine keeps one compiled version of each URL, so flushing a ruleset using any of these methods flushes it in all picos that have installed that ruleset with the same URL. |
Parsing KRL
You need to be able to check your ruleset for parse errors before checking it in. Debugging syntax errors on the rules engine is a messy business.
There are three four ways to do it.
- You can use the "Engine Rulesets" page, hosted by the pico engine at http://localhost:8080/ruleset.html, and copy and paste your KRL ruleset into ittry installing the ruleset into a pico. If there are errors, the first one encountered will be shown in red.
- You can download and run the node pico engine compiler on your own machine and run it from the command line.
- You can install a pre-commit hook for git, so that your code is automatically parsed when you try to commit changes. If your code fails to parse, the change will not be committed.
- You can flush the code from your pico engine using the developer UI. This will cause the engine to re-compile the ruleset and show any errors.
The second and third methods are recommended for any serious development.
To validate using the second method, Install the KRL Compiler using this command:
| Code Block | ||
|---|---|---|
| ||
npm install -g krl-compiler
krl-compiler -v # v1.0.1 |
Ensure that it is the same version as your pico-engine. After installing it, run the command krl-compiler --verify < <path to krl ruleset>. If this command doesn't output anything, the code parsed correctly.
To validate using the
...
fourth method, open
...

...
up the ruleset in your code editor. Make your changes and save the ruleset.
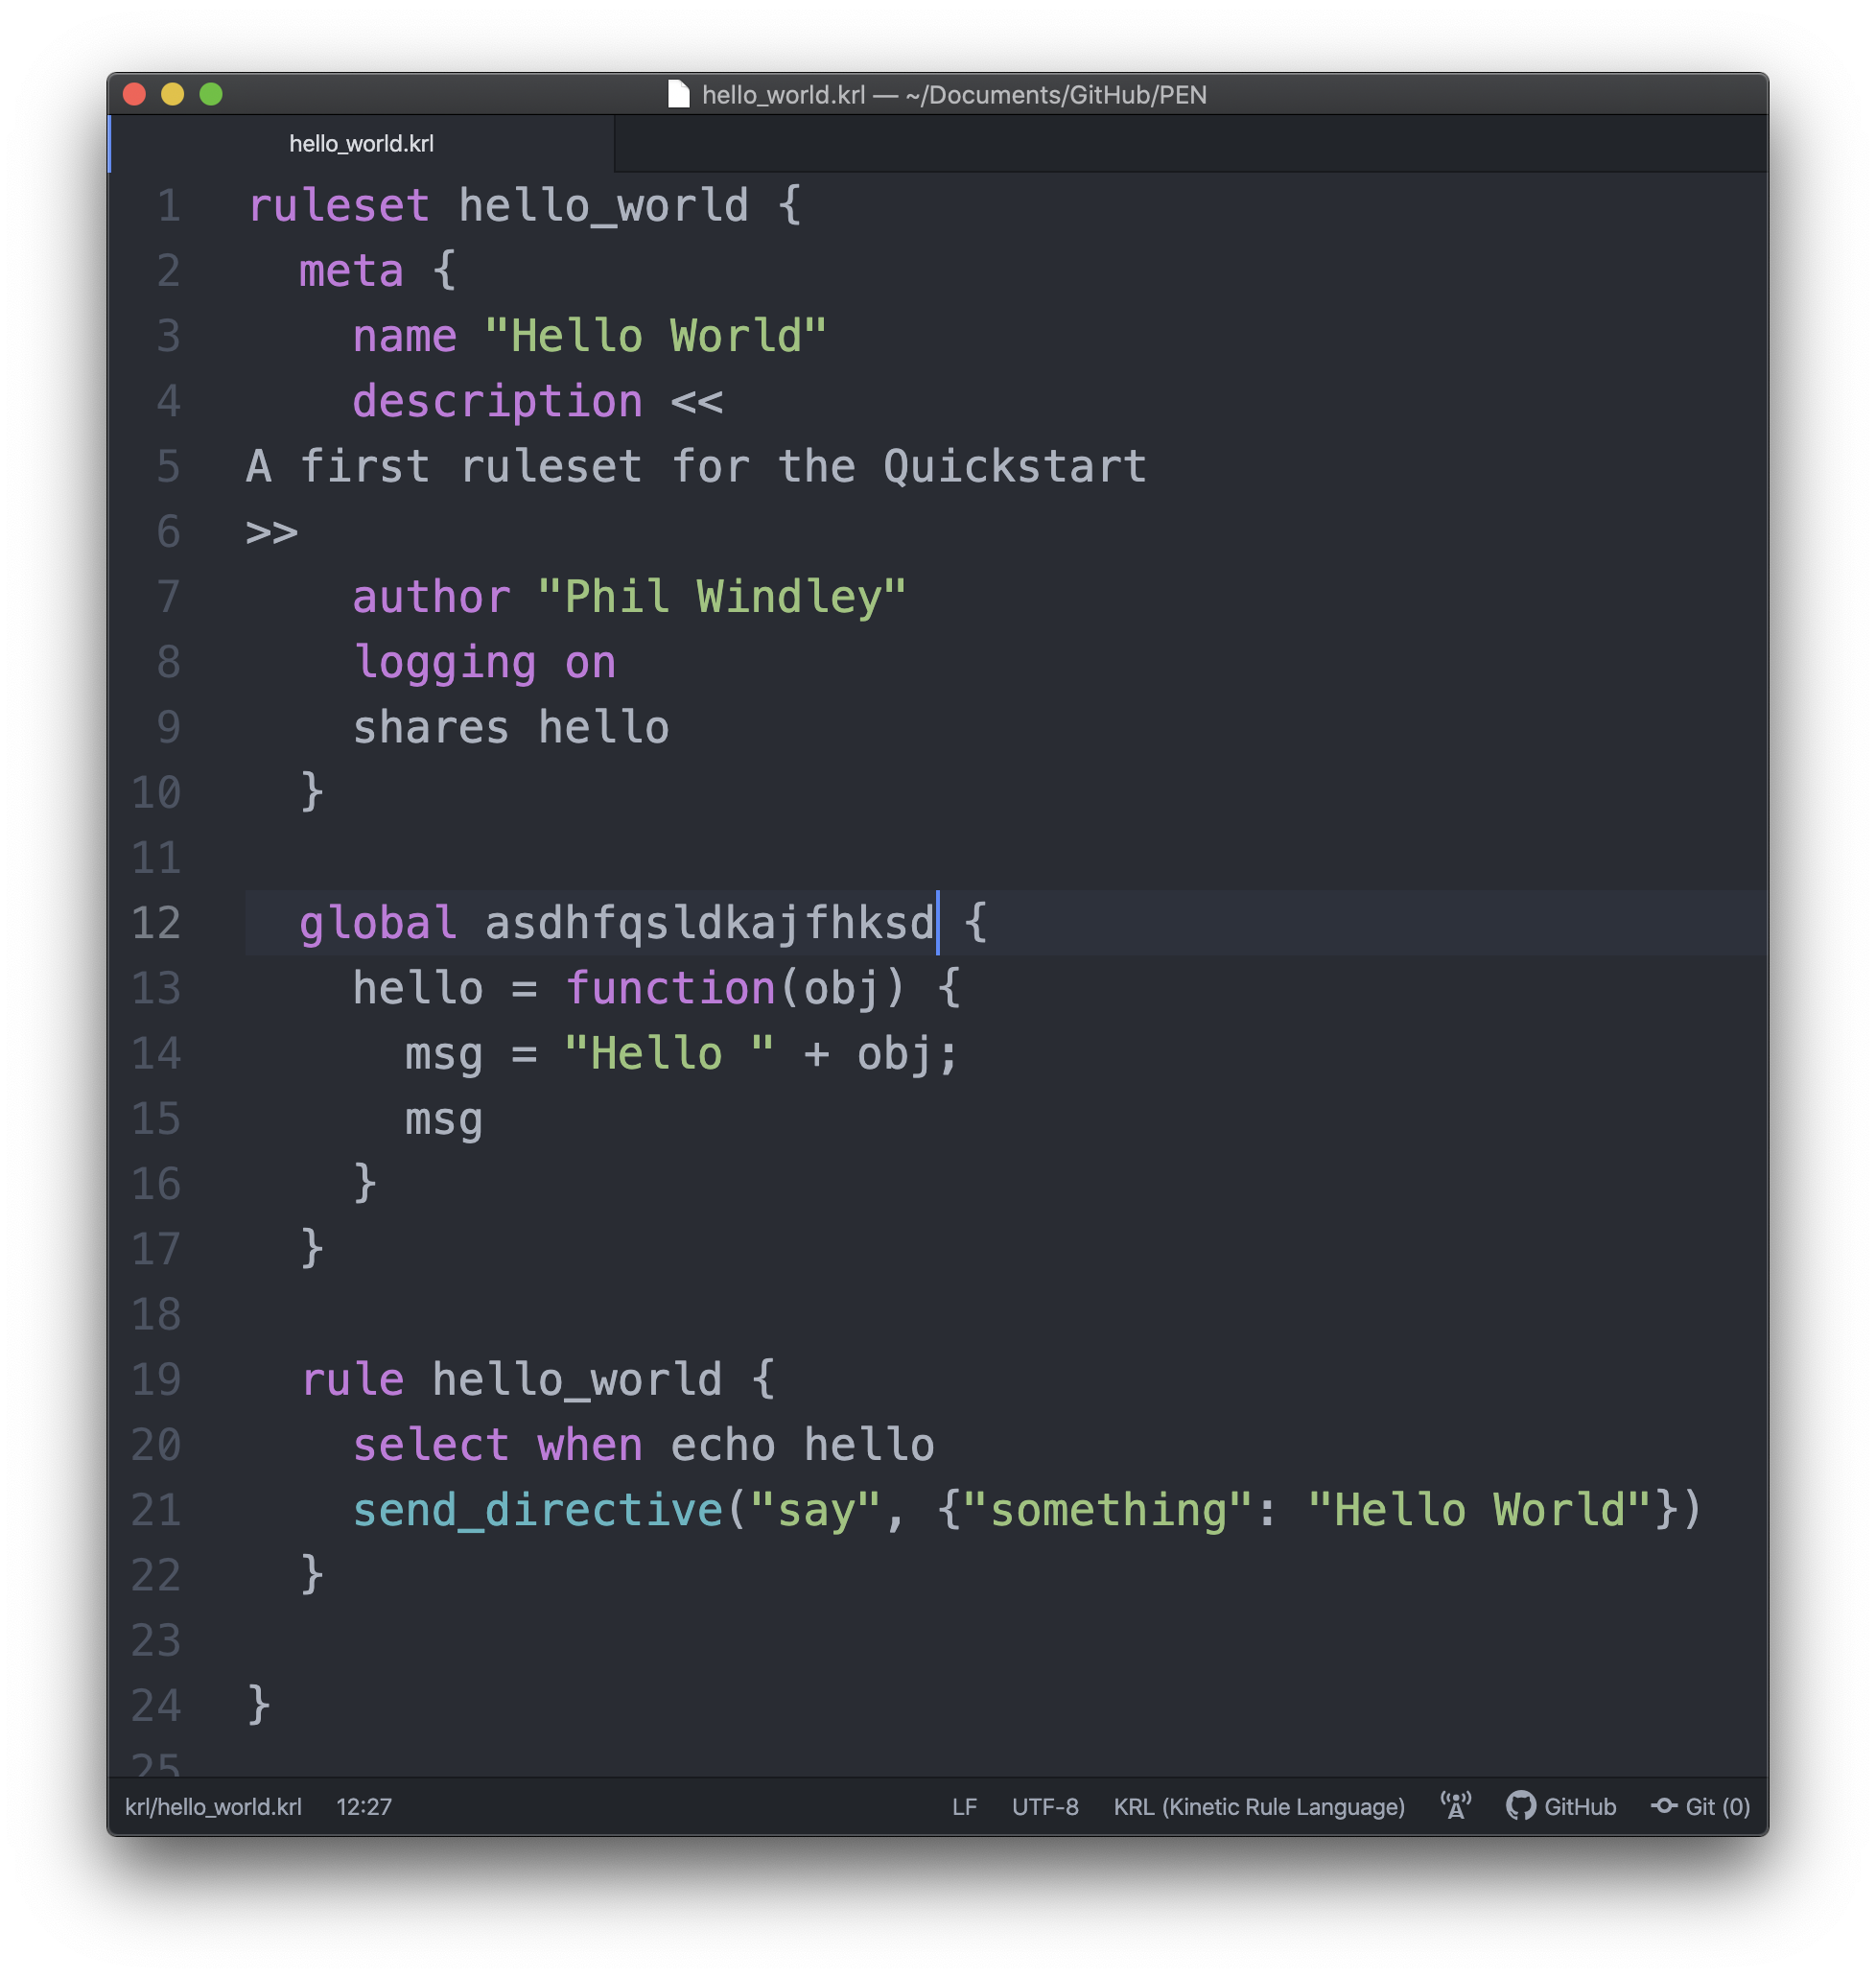
You'll notice that at line 12 I typed gibberish. This ruleset should fail to parse and flush.
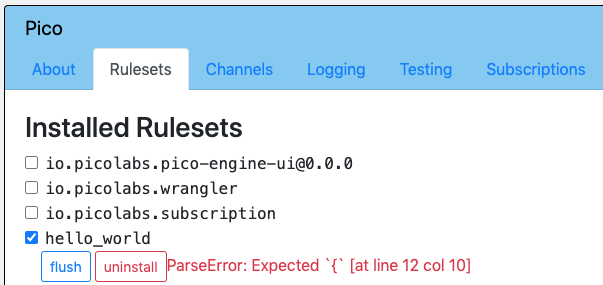
Open up the pico engine and navigate to the ruleset tab of the pico that has the ruleset installed. Flush the ruleset. If it parses correctly the ruleset will flush. If it doesn't, you will receive a parse error and the ruleset won't flush.
Initializing Rulesets
Rulesets often need to be initialized. The most common actions are setting the default values of entity variables, setting up scheduled events, and creating channels. Wrangler raises the wrangler:ruleset_installed even whenever a new ruleset is installed in a pico. An initialization rule selects on that event. You should include an event expression so that the rule only runs for the ruleset it's in. For example, the following rule sets defaults for two entity variables and sets a repeating scheduled event:
| Code Block | ||||||
|---|---|---|---|---|---|---|
| ||||||
rule inialize_ruleset {
  select when wrangler ruleset_installed where event:attr("rids") >< meta:rid
  pre {
    period = ent:heartbeat_period
             .defaultsTo(event:attr("heartbeat_period") || default_heartbeat_period)
             .klog("Initilizing heartbeat period: "); // in seconds

  }
  if ( ent:heartbeat_period.isnull() && schedule:list().length() == 0) then send_directive("Initializing sensor pico");
  fired {
    ent:heartbeat_period := period if ent:heartbeat_period.isnull();
    ent:emitter_state := "running" if ent:emitter_state.isnull();

    schedule emitter event "new_sensor_reading" repeat << */#{period} * * * * * >>  attributes { }
  }
} |
Initializing rulesets can save a lot of effort getting a pico set up properly and automate much of the work.