This page will guide you through the steps necessary to obtain and operate your own Kinetic Rules Engine (KRE).
Learning Objectives
After completing this quickstart lesson, you will:
- understand important concepts about programming in KRL including ruleset structure*
- know how to install and operate the node pico-engine
- know how to use the "Engine Rulesets" page to register a ruleset
- know how to add a ruleset to a pico
- become familiar with using the "My Picos" page to work with your picos
Concepts
*This section is copied verbatim from Quickstart (the one for the original KRE system)
Getting started with KRL can be a big leap because there are so many things that are different about programming in KRL:
- KRL is a rule-based language.
- KRL primarily follows an event-based programming model.
- KRL programs execute with a cloud-based model; there is no way to execute them from the command line.
- KRL programs are loaded from the cloud using HTTP.
- KRL programs execute in a system where identity is pervasive; all events are raised on behalf of a specific entity.
- KRL programs have built-in, entity-specific persistent storage; there is no need for external databases.
The result of these properties is a programming model that more closely resembles programming cloud-based persistent objects than anything else. We call these persistent computational objects "picos".
KRL is executed by your instance of the node pico-engine, an open-source, cloud-based rule processing system. All of the properties listed above are present in any KRE system.
Install and run the node pico-engine
Prerequisite: you will need to install node (also known as Node.js) on your machine. It includes npm, the node package manager.
$ npm install -g pico-engine
$ PORT=8084 pico-engine
http://localhost:8084
In the example above, port number 8084 was chosen. By default, if you run the command `pico-engine` without setting the environment variable, port 8080 will be used. The node pico engine will spend some time initializing internal data structures before it starts its web server.
When you first run the node pico-engine, it does some initialization work, which may take some time. After doing this, it starts a web server on the port you selected, if any, or on port 8080.
Note that the web server displays the URL of its document root, ex. "http://localhost:8084" and then continues to run. As we will see later, messages will be logged to this console.
Create a primary, or owner pico
Visit the default web page of your web server. As this page loads, it will perform a bootstrap sequence, which creates a pico, naming it "Owner Pico" and then registers and installs two rulesets.
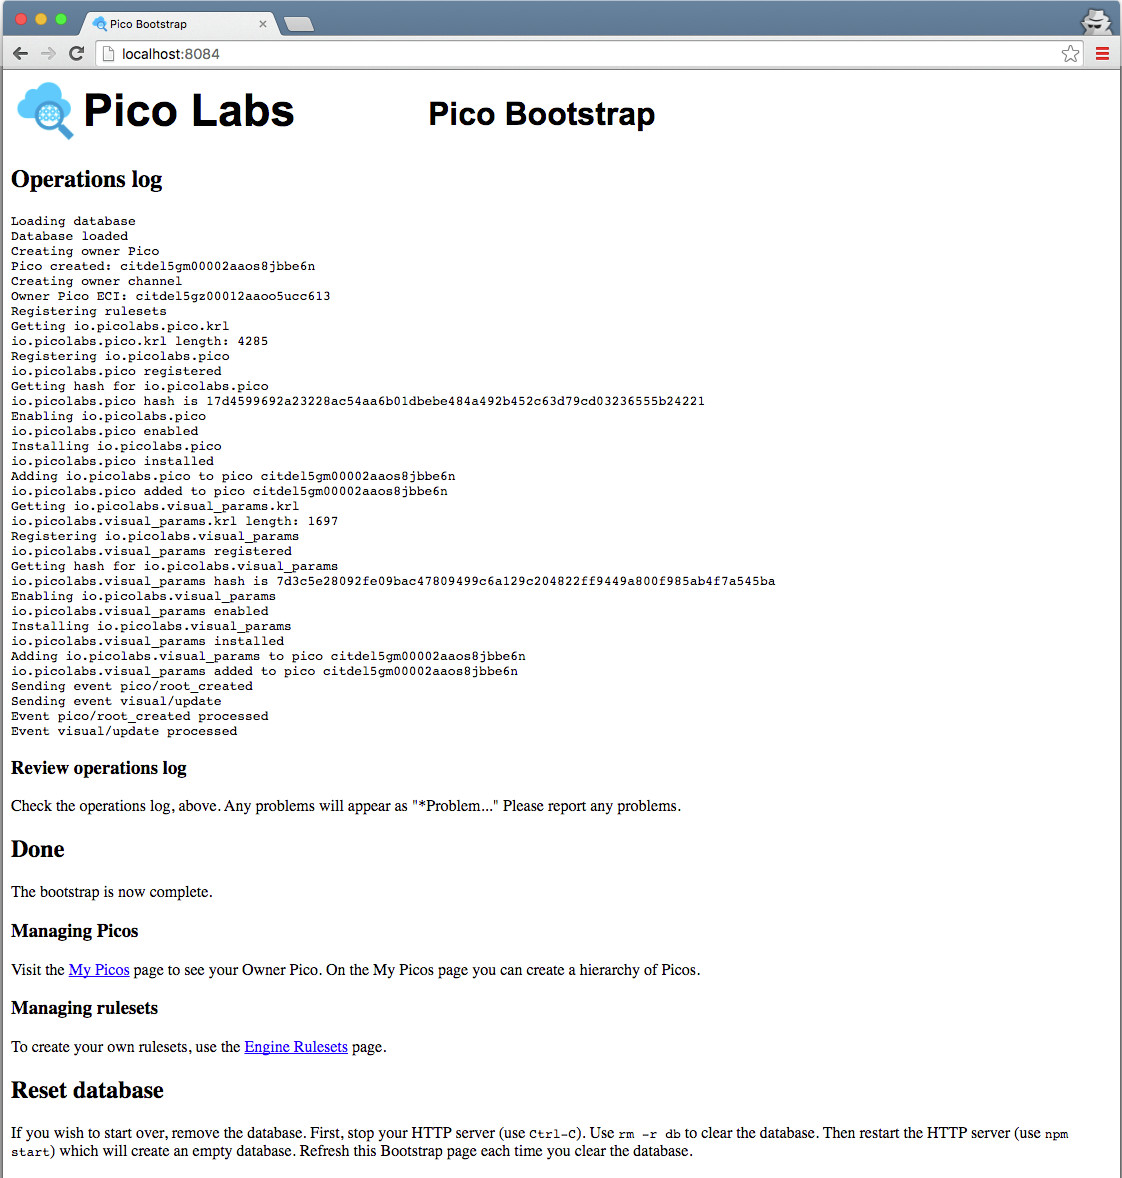
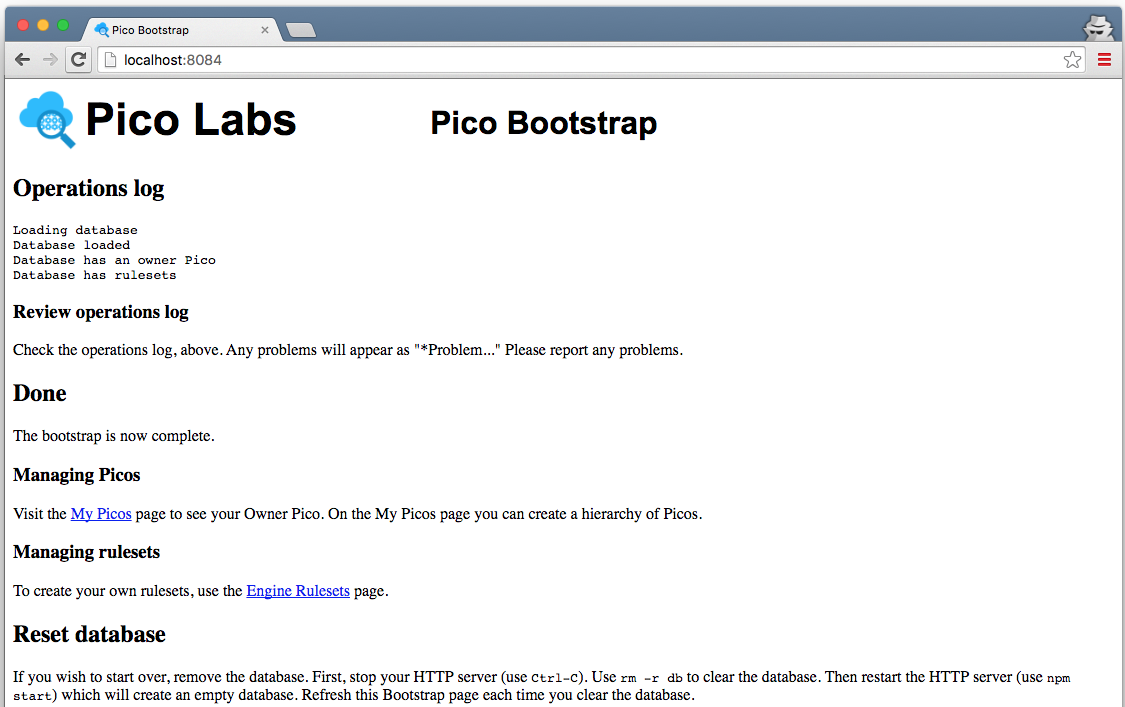
Subsequent visits to the same page will short-circuit the bootstrap (because it's already been done).
In the console window in which the node pico-engine is running, there will be some logging concerning the two events sent during intial bootstrapping. You may find it interesting to try to make sense of these log messages.
Writing KRL
Here is a sample KRL ruleset:
ruleset hello_world {
  meta {
    name "Hello World"
    description <<
A first ruleset for the Quickstart
>>
    author "Phil Windley"
    logging on
    shares hello
  }

  global {
    hello = function(obj) {
      msg = "Hello " + obj;
      msg
    }
  }

  rule hello_world {
    select when echo hello
    send_directive("say") with
      something = "Hello World"
  }

}
Open the "Engine Rulesets" page (linked from the "Pico Bootstrap" page), and paste the ruleset above into the big text area, and click the "validate" button. When your KRL compiles correctly, you will see a result of "ok" beneath the buttons, with the page looking like this screenshot.
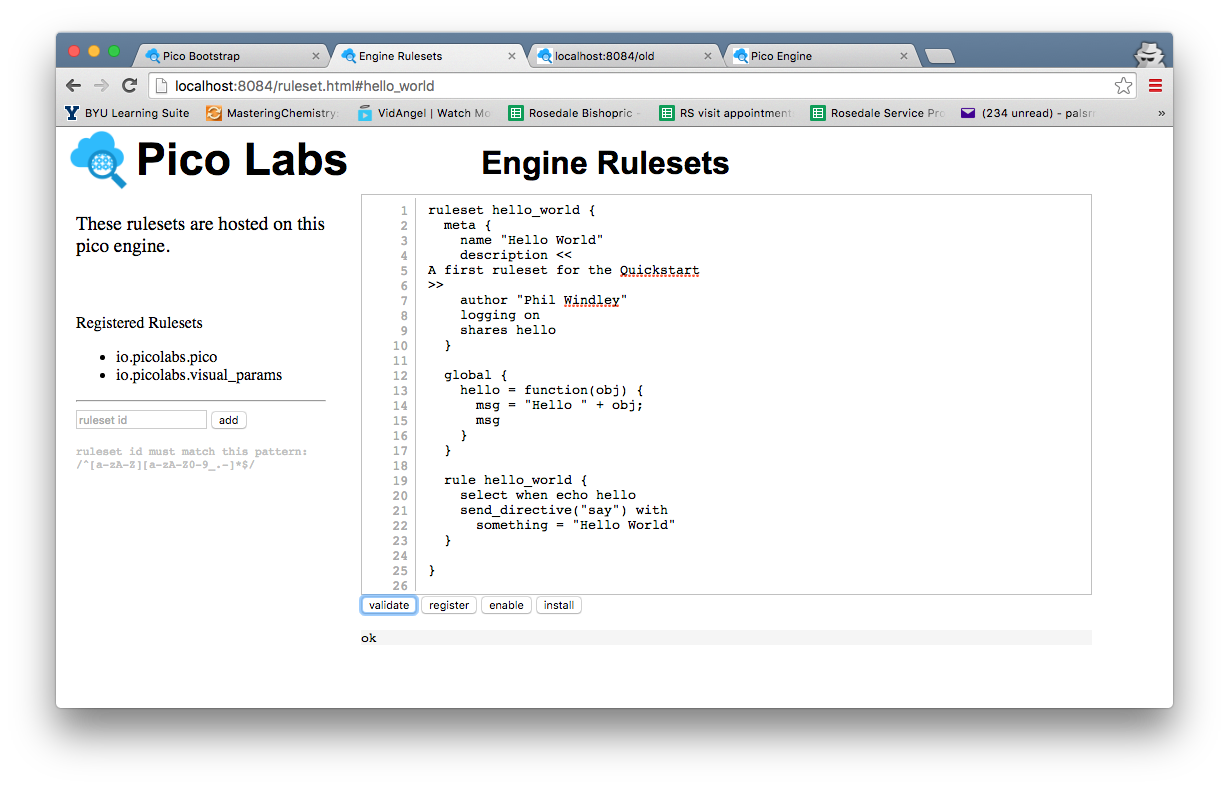
Hint: The editor in the "Engine Rulesets" page is very primitive and does not include a "save to disk" option. You should also save your ruleset somewhere in your file system (or in a repository), named, say "hello_world.krl"
Click on the "register" button, and then your page will look like this screenshot.
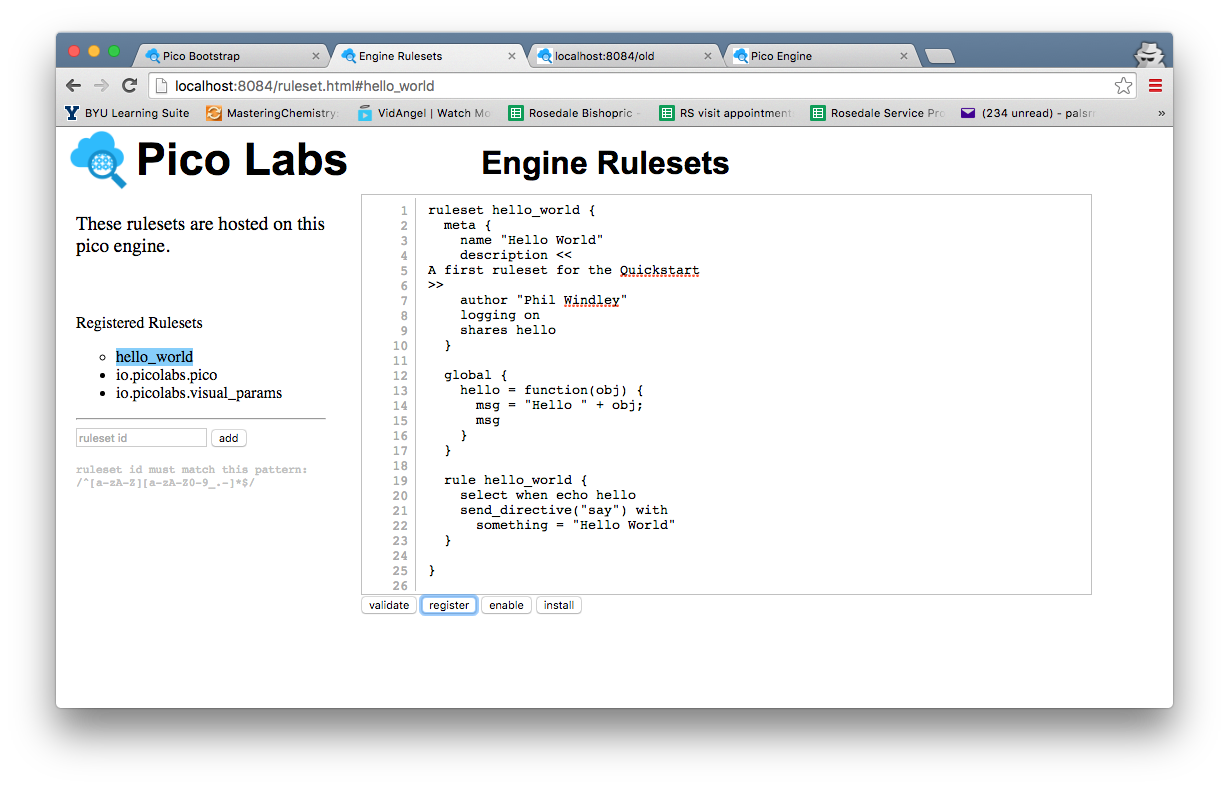
Your ruleset is now registered with the node pico-engine, and its name is highlighted in the list of registered rulesets. Notice the circle beside the ruleset name. This indicates that the source code has been registered with the pico-engine, but is not yet enabled. Click on the "enable" button to take care of this.
Finally, click on the "install" button. This causes the pico-engine to compile the KRL and cache the compiled version in a rulesets folder. Once this has been done, the ruleset can be added to picos.
Adding the Ruleset to your pico
So far, you have installed the ruleset into your pico-engine. But it can't run unless it has been added to a pico.
Adding a ruleset to a pico is properly a user function, but as a developer, you are functioning in both user and developer capacities.
View your Owner Pico by visiting the "My Picos" page (linked from the "Pico Bootstrap" page).
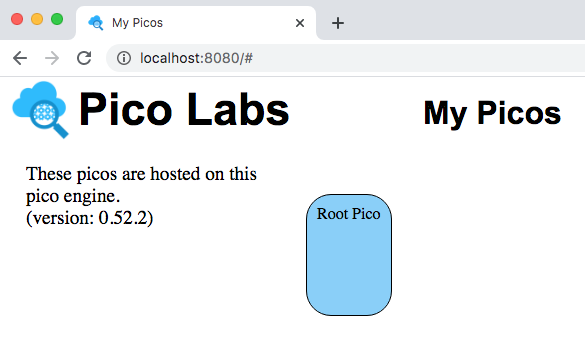
Your owner pico is represented by a rounded rectangle, which is placed on a canvas, allowing you to change its placement.
Click on the rounded rectangle, on your Owner Pico. It expands giving you access to information about it.
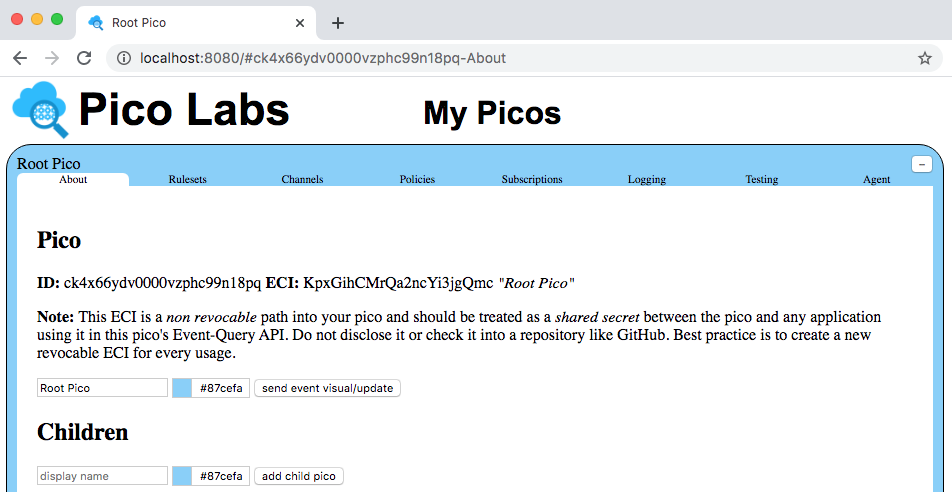
The "About" tab will be used in subsequent lessons.
Click on the "Rulesets" tab.
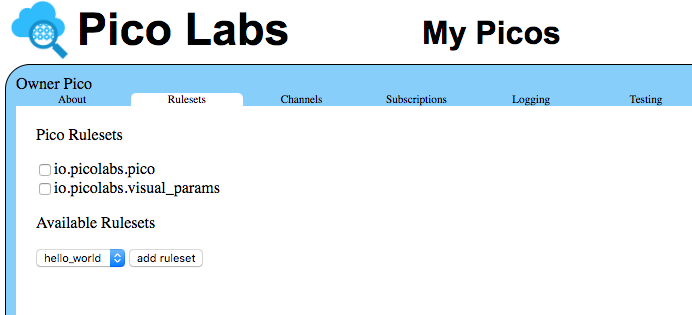
Notice that the name of your ruleset is mentioned in a drop-down list of available rulesets. Click the "add ruleset" button to add the ruleset to your pico.
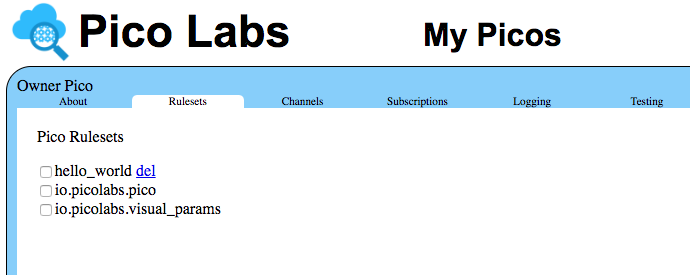
Notice that you are allowed to delete the ruleset from the pico.
Next Steps
Having completed this quickstart, you should continue with Lesson 1. Events and Queries