The following is a suggested workflow for new Pico developers. Related information is available in the following resources:
Programming involves a collection of tools, often referred to as the "tool chain" since they are used more or less in sequence. Here's a graphical representation of the tool chain for programming picos, noting each stage. We'll use this to organize the remainder of this document.
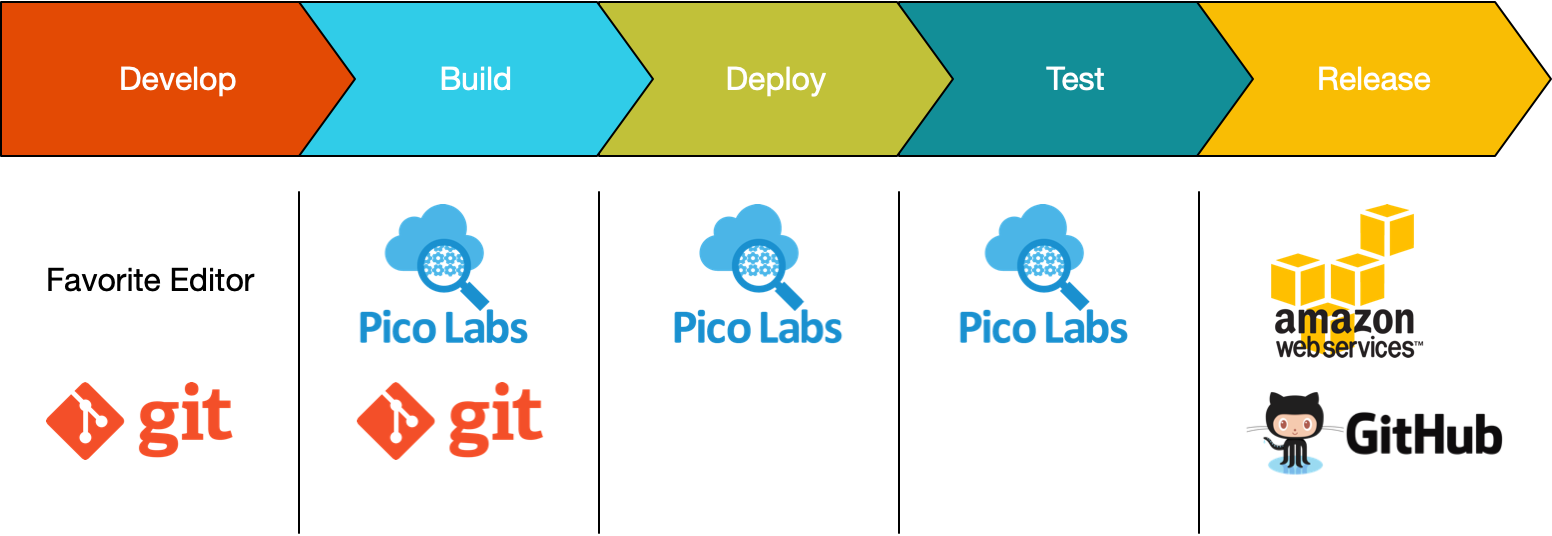
Develop
To develop KRL for picos, you can use Git (or another versioning tool) and your favorite editor. There are plug ins for several popular editors.
Create a directory for your project
$ mkdir workflow
$ cd workflow/
Initialize the project directory as a Git repository
$ git init
- Create a KRL ruleset as a file in the repository using your favorite editor. There may be a KRL plugin for your editor.
Build
The build process for rulesets primarily involves parsing to ensure it is correctly formatted. The preferred way to do this is using a Git pre-commit hook.
Follow the directions in Setting Up a Git Pre-Commit Hook to Parse KRL to set up the KRL parser and ensure that KRL files are parsed before they are committed.
Add the file to the repository and commit it.
$ git add hello_world.krl
$ git commit -a -m "initial commit"
Flushing com.windley.hello_world
[master (root-commit) 4a2f95c] initial commit
 1 file changed, 34 insertions(+)
 create mode 100644 hello_world.krl
With the pre-commit hook in place, you're assured that there are no parse errors in your ruleset if it commits.
Register
Registering a ruleset associates its ruleset ID (RID) with a URL where it is located.
Because rulesets in KRL are hosted internet objects, the engine loads, parses, compiles, and caches them for efficiency. Each ruleset only needs to be registered once on a given pico engine. Registering the ruleset associates its RID with the URL where it's found. The RID is taken from the ruleset source. It's the identifier that directly follows the ruleset keyword. Best practice is to use a reversed domain name that you control in the RID to ensure uniqueness since two developers could choose the same name otherwise.
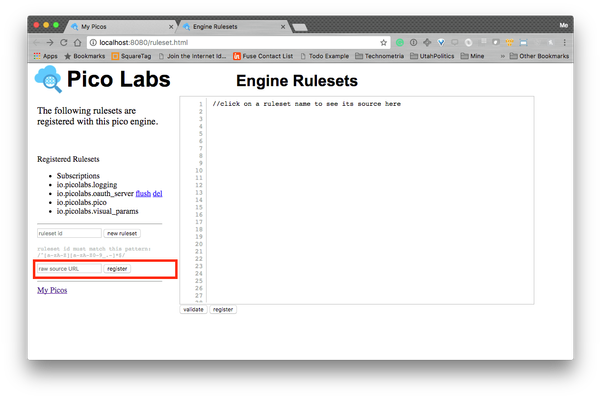
Register the ruleset with the pico engine. There are automated ways to do this, but for initial development, you can do in manually. Navigate to the rulesets.html resource on your engine (i.e. if you engine is running at localhost:8080, then go to http://localhost:8080/rulesets.html. You can enter the URL of the ruleset in the box marked in red in the screen shot below. You can use the file: URL scheme to load the ruleset from the filesystem directly into the engine rather than relying on an external server. The file URL is the schema file:// prepended to the full pathname of the file (yes, there are three slashes):
file:///Users/pjw/prog/picolabs/pico_lessons/workflow/hello_world.krl
The engine will parse, compile, and make your ruleset available for use by any pico in that engine.
File-based URLs work great for development where quick turnaround is needed. If you want to host rulesets somewhere else, please be sure to read the tips for hosting rulesets.
Again, you only need a register a ruleset once on any engine, even if the source code changes. The only reason to re-register a ruleset is if it's RID or URL change.
Deploy
Deploying includes two different tasks: flushing cached artifacts from the ruleset in the engine and installing the ruleset in any picos it needs to run in.
Flushing
Because the engine compiles and caches the ruleset, whenever you make changes to the source, you need to flush the ruleset. The Git pre-commit hook you installed in the Build step does that automatically for local engines (hosted on the local machine). If you're not deploying to a local engine you will need to set up a method for flushing the ruleset as part of deploying it. You can do this manually from the registered rulesets page (at rulesets.html) on the pico engine or using a URL.
Installing
Install the ruleset in your pico by navigating to the Rulesets tab in the pico interface. For rulesets that you've already registered, you can simply select their name from the pulldown menu and click "install ruleset". 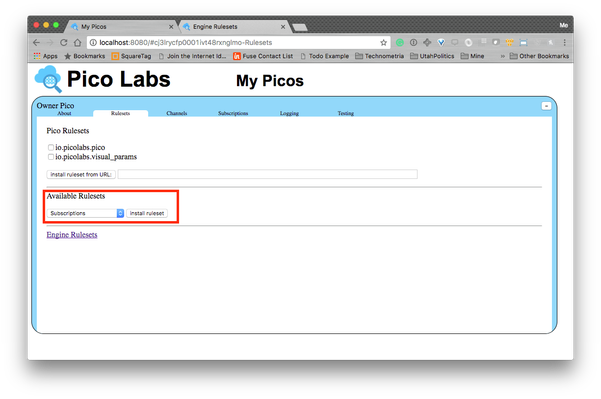
Note that you can register and install the ruleset in one step from this page for convenience by installing from a URL.
Test
The pico engine UI includes support for testing your rulesets. See the detailed instructions for more information on how to configure and use that feature.
The Logging tab in the pico engine UI is also helpful in debugging and testing rules.
Release
For local development, there's no need to do anything more than what's specified above for releasing a ruleset.
If you're releasing a ruleset for broader use beyond your own needs, you'll want to take steps to ensure others see a stable ruleset even though you may continue to work on it. Putting your ruleset on an HTTP server allows it to be registered with multiple engines.
The first step is to decide where you want to host your rulesets. Any HTTP server will do. Here are some tips for hosting code on GitHub and AWS.
You can use directories on AWS to create a stable set of code for a given release. GitHub has a feature called "releases" that create a tag for a given version. Both of these work well.