(Classic) Quickstart for SquareTag
Deprecated!!
This page is an old Quickstart that used the SquareTag system. This method of developing KRL has been deprecated in favor of the KRL Developer Tools described here.
This guide will walk you through getting your first application running on SquareTag.com. At the end of this document are suggested next steps.
To get started developing applications for SquareTag.com, there are a few things you have to do:
- Set up a personal cloud on SquareTag.com and configure it for development
- Write an app
- Install your app in your cloud
Feedback Welcome
We're constantly working to improve our documentation and developer experience, should you have any feedback, questions, or concerns, please feel free to contact us.
Setting Up Your Personal Cloud on SquareTag.com
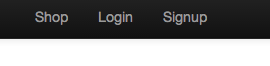
If you don't already have a SquareTag Account, the first step to developing an CloudOS application is creating an account and configuring your new cloud. Just visit https://squaretag.com and look for the "Signup" link in the upper-right hand corner of the page:
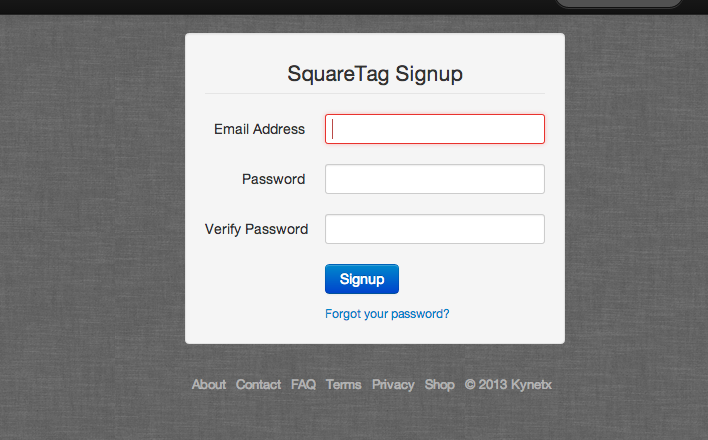
After clicking on it you will be greeted by a page that looks like this:
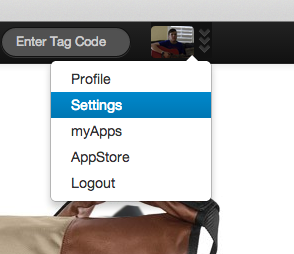
Once you have an account, click on the avatar icon in the upper-right hand corner. A dropdown will appear. Click on "settings.":
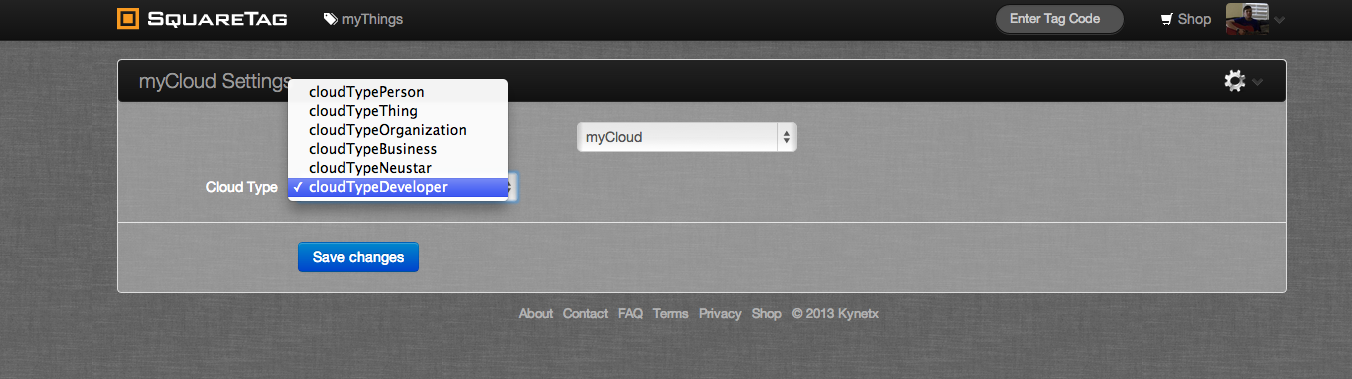
The following window will appear which contains a dropdown. Choose "myCloud.":

Next you will be able to choose what kind of cloud you want. Since you are a developer, you want a developer cloud:
Save your adjustment. Your cloud is now configured for development! Now we need to install the Kynetx Developer Kit, a toolkit that supplies developers with helpful utilities and functions for writing and debugging CloudOS applications.
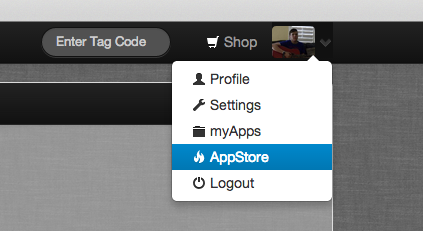
To install the Kynetx Developer Kit, first we need to visit the app store by clicking on it in the dropdown in the upper-right hand corner of the page:
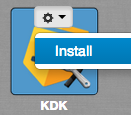
A gear icon will appear as you hover over the Kynetx Developer Kit application icon. Click on it, then click on "Install" to install it:
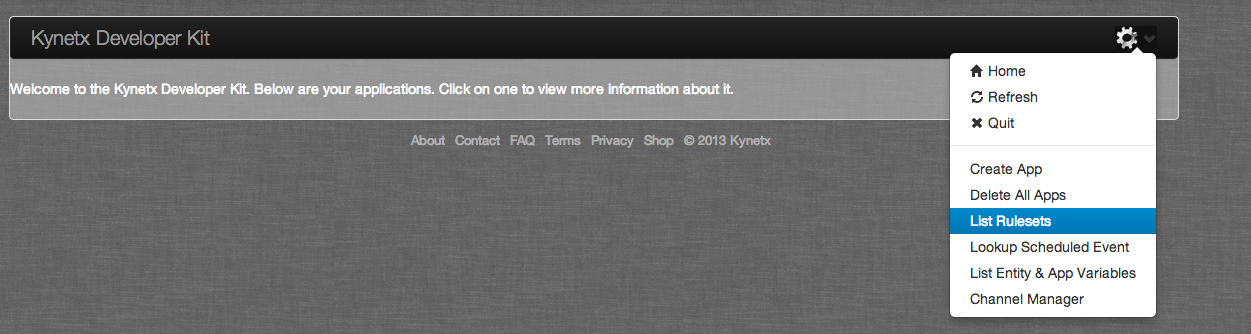
Then visit myApps by clicking on it the dropdown in the upper-right hand corner of the page. The Kynetx Developer Kit should now be present in your list of applications. Click on it to run it. You should see a window that looks something like this:

Congrats! Your cloud is now setup for CloudOS application development and you've installed the tools you need to make awesome apps! Lets take a look at writing your very first app.
Writing Your First App
Alright, lets look at what it takes to write a "Hello World" CloudOS application. Open a new file called HelloWorld.krl in your favorite editor and paste the following template in:
ruleset HelloWorldApp {
  meta {
    name "Hello World"
    description <<
      Hello World
    >>
    author ""
    logging off
  }
  global {

  }
  rule HelloWorld {
    select when web cloudAppSelected
  }
}
This is a basic template that includes all the essential parts of a ruleset. It won't actually do anything until we add more code to it. Since we're writing this app to run inside the CloudOS we'll be modifying it quite a bit. If you're not familiar with KRL, be sure to read all of the children of the Rulesets page. These will help explain the different parts of the ruleset.
The select statement defines the event conditions under which this rule will be selected. The CloudOS raises the web:cloudAppSelected event whenever a user clicks on an app to run it. So, we want our HelloWorld app to be looking for that event and respond to it. With the select statement added, your rule should look like this:
rule HelloWorld {
 select when web cloudAppSelected

}
Rules have preludes for calculating values used later in the rule. Our prelude is merely going to define some HTML to display and bind it to a variable
rule HelloWorld {
  select when web cloudAppSelected
  pre {
    my_html = <<
      <h5>Hello, World!</h5>
    >>;
  }
}
Everything inside the << >>'s (called extended quotes) are assigned to the variable my_html.
Next, add an action block. Inside the action block, paste the following three lines:
rule HelloWorld {
 select when web cloudAppSelected
  pre {
    my_html = <<
      <h5>Hello, World!</h5>
    >>;
  }
 {
  SquareTag:inject_styling();
  CloudRain:createLoadPanel("Hello World!", {}, my_html);
 }
}
The first action, inject_styling(), makes the styling of our app compatible with SquareTag. The second, createLoadPanel() creates a panel in the CloudOS dashboard with the title "Hello World!" and loads the HTML we defined in the prelude into the panel we just created.
These are actions are defined within the SquareTag and CloudRain modules. Note that we have not yet imported these modules. Let's go import those modules now.
Importing the CloudRain and SquareTag modules
KRL modules can be defined and imported into other rulesets. A module is literally just a ruleset that provides functions and actions for you to use. See the Modules page for more info on modules. We have two modules that we are trying to use (CloudRain and SquareTag) that have not been imported yet. To import these two modules, add the following two lines into the meta block:
use module a169x701 alias CloudRain
use module a41x196  alias SquareTag
Committing and Deploying the Ruleset
After all of these changes, your ruleset should now look like this:
ruleset HelloWorldApp {
  meta {
    name "Hello World"
    description <<
      Hello World
    >>
    author ""
    logging off
    use module a169x701 alias CloudRain
	use module a41x186  alias SquareTag
  }
  dispatch {
  }
  global {
  }
  rule HelloWorld is active {
    select when web cloudAppSelected
    pre {
      my_html = <<
        <h5>Hello, world!</h5>
      >>;
    }
    {
	  SquareTag:inject_styling();
      CloudRain:createLoadPanel("Hello World!", {}, my_html);
    }
  }
}
Make note that we've added the empty "dispatch{}" tag as well as "is active" to our HelloWorld rule.
You can make any changes to the author and description portions of the meta section that you like.
Awesome! This app is now ready to be tested. Lets look at registering, installing, and running this app.
Installing and Running Your App
Alright, so we have a ready-to-go file named HelloWorld.krl. How do we tell CloudOS about it so it can run it for us? We use the Kynetx Developer Kit!
There are two steps. First we have to tell the rules engine where the code lives (register the app). Second we have to install it in our own account to run it. The first step only has to be done once per app, the second step will have to be done by anyone who wants to run the application.
Two steps might seem like an unnecessary complication, but it follows from the fact that rulesets are hosted online and so the engine has to know where to find them. That's the registration process.
The second follows from the fact that every user has their own instance of a pico with it's own data, applications, and addresses (we call them channels). So any user that wants to run an application has to install it, after it's been registered.
Registering the App
First, open up the Kynetx Developer Kit (KDK, for short), and click "List Rulesets.":
Next, select "Register Ruleset" from the same menu:

Here you can tell CloudOS where the source code for your application lives. The source must be accessible via HTTP/HTTPS, optionally with HTTP basic authentication (username and password passed in the URL). GitHub is a great place to host source code and raw code files on Github are accessible via HTTP/HTTPS. You can host your code wherever you please, but we'll use GitHub for this tutorial:
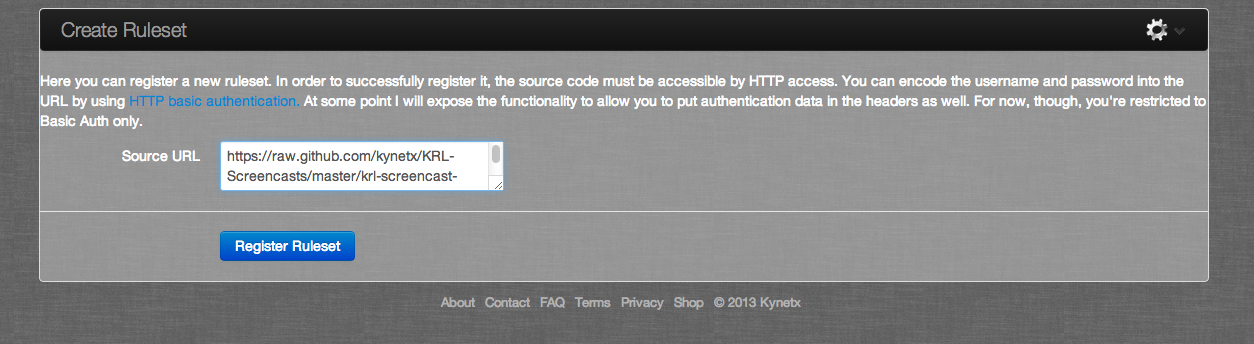
A couple of things to note about hosting code:
- The URL must return the ruleset, so if you use Github, ensure you use the "raw" link.
- The KRL rule engine (KRE) retrieves from the URL, parses and optimizes it, then caches the result. Consequently, you must flush the cache whenever the code changes. See the page on hosting code on Github for more information.
After entering your source code URL, click "Register Ruleset." If it was successfully registered, you'll be redirected to a list of your registered rulesets. It should look something like this (with a different value for RID and Source URL of course):

Installing the App
Now CloudOS now knows about our ruleset, we just have to add this ruleset as a developer application, and we're good to go. You'll need to know the ruleset ID (RID) of the ruleset you just created in order to install it in the following steps, so take a minute to copy it to the clipboard or write it down.
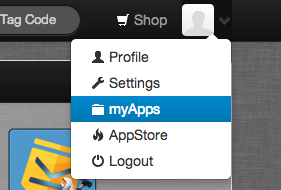
Click on your avatar in the upper-right hand corner of the screen and select "myApps.":

Click on the gear icon in the myApps window, and select "add devApp":

You'll be presented with a window where you can enter your apps information and give it an image: (The RID is the same value as under your list of registered rulesets, leaving off the ".prod"):
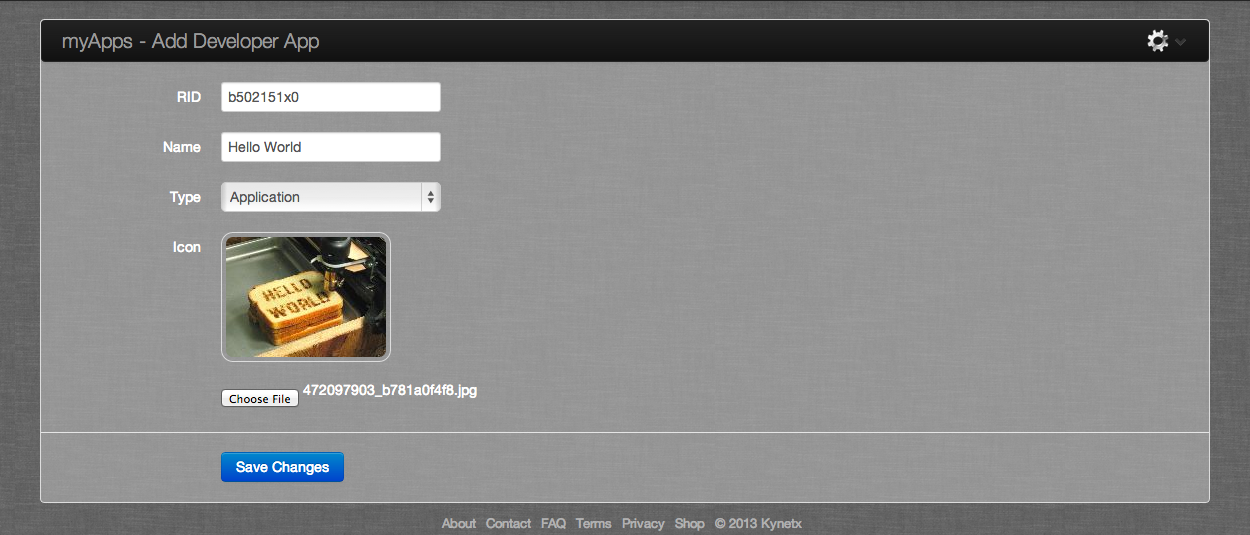
Click "Save Changes." After your applications information has been successfully saved, go to myApps once more by selecting it from the avatar dropdown menu:
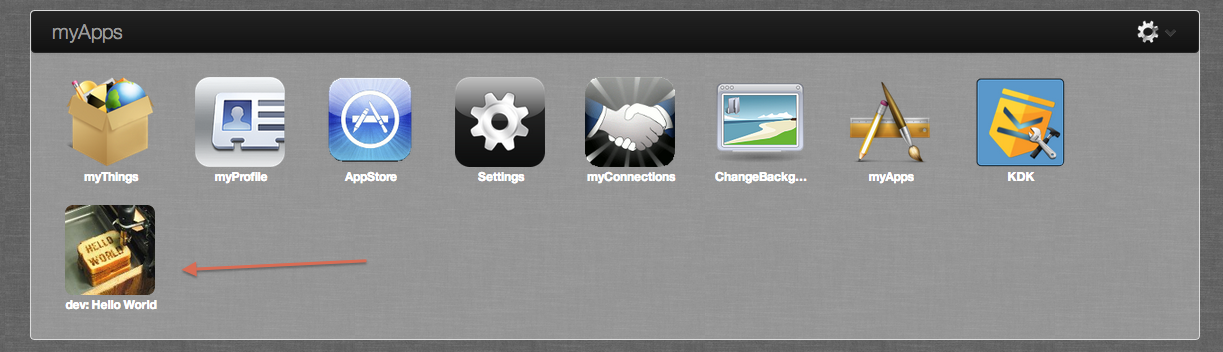
If everything worked, your application should be installed and listed under myApps:
Finally, click on your application to run it. You should see a similar window appear:

Awesome! Our app is now installed and running in CloudOS! Take a look at the "Next Steps" section to see where to go from here.
If you don't see this, check the preceding steps. The information on debugging KRL rulesets might also be helpful
Next Steps
Writing apps for SquareTag involves a lot of new concepts. The following will help you understand SquareTag Development better:
- (Classic) Tips for Developers
- (Classic) Sorting It All Out: SquareTag, CloudOS, and KRL
- Learning KRL
- (Classic) Debugging KRL Rulesets
There are several directions you could go from here:
- Build your own echo server to understand the event protocol.
- Try using an external API in your app
- Try linking Dropbox to your app.
Copyright Picolabs | Licensed under Creative Commons.