...
This Quickstart will help you get your KRL programming environment set up and working.
Learning Objectives
After completing this Quickstart lesson, you will:
- understand important concepts about programming in KRL including ruleset structure
- have created an account on KRE
- know how to use Devtools to register a ruleset
- have installed a ruleset in your pico
- understand how to flush a ruleset
Concepts
Getting started with KRL can be a big leap because there are so many things that are different about programming in KRL:
...
- available via HTTP and identified by a URL
- The URL must be registered with one or more instances of KRE and given a ruleset ID or RID
- The RID must be installed in one or more picos
- The pico must receive a request via the Sky Cloud API or the Sky Event API
Prerequisites
To complete the Quickstart, you will need
- An editor. There are KRL plugins for many popular editors
- A GitHub account
- An account on a KRE instance. The easiest way to do this is to use the Pico Labs-hosted instance of KRE.
Creating an Account and Pico
...
- Create a Kynetx account and pico
- Authorize the KRL Developer Tools application to access your account and it's associated pico (using OAuth).
| Info |
|---|
The styling of the account creation and OAuth authorization page is different than the KRL Developer Tools page styling. This is normal in an OAuth situation. |
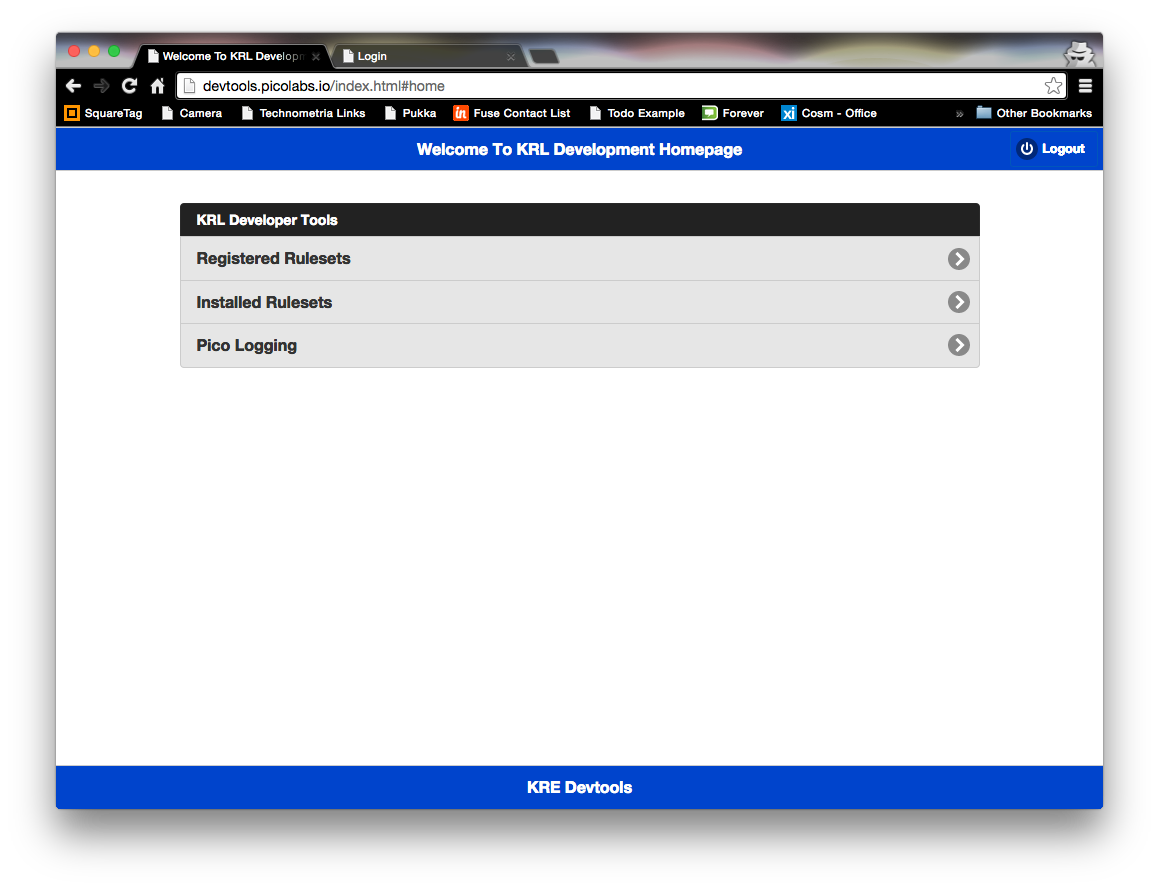
Once you create your account, the minimum rulesets for running the pico and the KRL Developer Tools will have been installed. After authorizing the KRL Developer Tools you should see the main page:
Writing KRL
Do the following:
- Create a
gitrepo for your KRL rulesets and put it on GitHub. You can create a different repo for each ruleset if you like or create one repo and put multiple rulesets in it. Create file in your ruleset repo called
hello.krland put the following in it:Code Block language javascript theme Confluence ruleset hello_world { meta { name "Hello World" description << A first ruleset for the Quickstart >> author "Phil Windley" logging on sharing on provides hello } global { hello = function(obj) { msg = "Hello " + obj msg }; } rule hello_world { select when echo hello send_directive("say") with something = "Hello World"; } }Use one of the methods in (Classic) Tips for Developers to validate (parse) your ruleset.
Info Installing and using the KRL command line parser can be a real time saver if you're going to be writing several rulesets. Checking in and trying to execute rulesets that don't parse is one of the primary frustrations of beginning KRL developers.
- Check your ruleset into GitHub.
Registering Your Ruleset
Getting your parsed ruleset into GitHub is a great first step, but the rules engine doesn't know anything about it. Registering a ruleset gives it a Ruleset ID (RID) in the rules engine so that other users can install and run it.
...
| Info |
|---|
You only need register a ruleset once. Once the RID is created, you can use the KRL Developer Tools to update the URL if you change the location where you're storing it. |
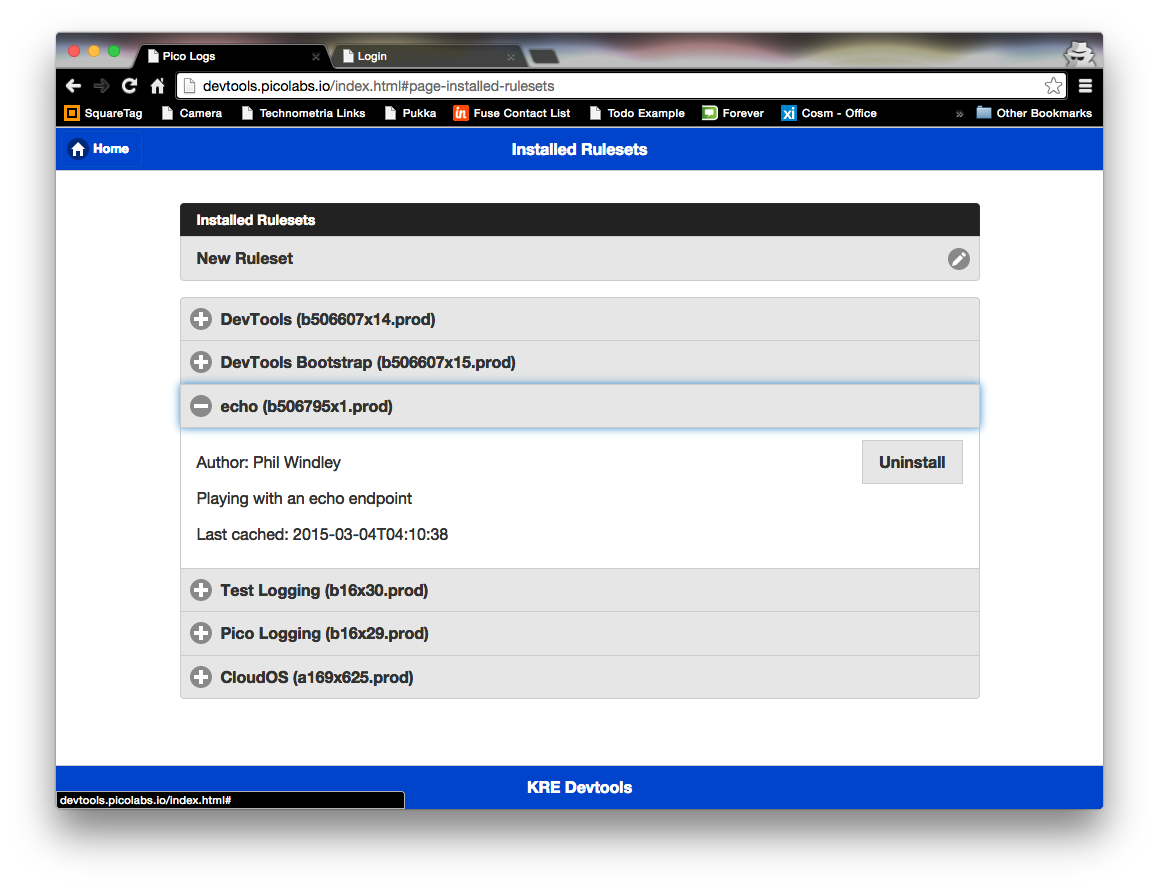
Installing the Ruleset
Registering a ruleset tells the rules engine about it, but doesn't put in any pico so it can be run. Installing the ruleset in a pico is a separate activity. Registering rulesets is a developer activity, while installing them is a user activity. As a developer, you're in both roles, so you have to do both. Consequently, the next step is to install your ruleset. We're going to install it in the same pico that we're running the KRL Developer Tools from.
...
Clicking on the ruleset you just installed will show you information about it (and give you a button for uninstalling it if you choose):
Flushing the Ruleset
When the rules engine reads a ruleset from the URL where it is located, the rules engine parses it, optimizes it, and caches the result. The next time the ruleset engine needs the ruleset it uses the cached copy, saving time in getting, parsing, and optimizing. This presents a challenge to the developer since changing the KRL in the ruleset doesn't tell the rules engine that new code is available.
...
The rules engine has an API for flushing rulesets so you can tell it that the code has changed. The (Classic) Tips for Developers gives instructions on how to use the API to flush rulesets. I usually take the time to set up a post-commit hook in GitHub when I use the GitHub repository for my rulesets so that a soon as I check them in, they have been flushed from the rules engine. This saves countless frustrating moments trying to figure out why your changes are being seen in the rules engine when in fact you just forgot to flush the ruleset from the rules engine.
Debugging the Ruleset
See (Classic) Debugging KRL Rulesets for detailed information.
Next Steps
After completing this Quickstart you should continue with the Pico Programming Lessons.
...