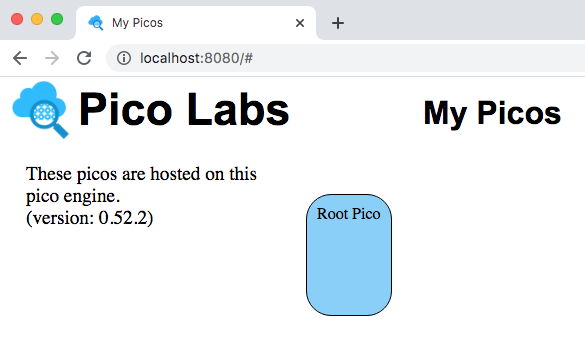
The My Picos page will be at http://localhost:8080/ , assuming that you have used the default port and are running the pico engine on your own machine.
Overview of all your picos
When you visit this page, you will see a rounded rectangle which represents your root pico.
If you have created child picos, they will also be visible on this page, each joined to its parent pico by a solid black line. Each pico can be dragged to move it to a different location on the canvas. You can also drag a corner to reshape and resize it.
More detail for a single pico
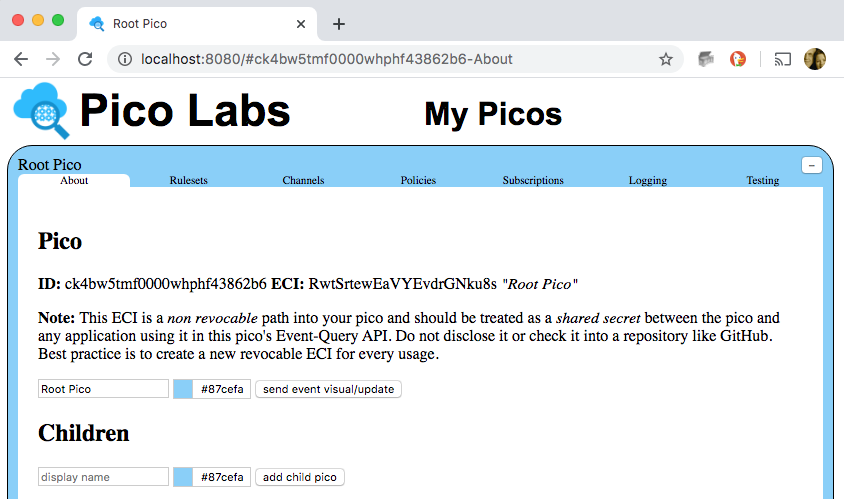
A single left mouse click on the rounded rectangle will open it up for a more detailed look at the properties of your root pico.
UI tabs
The information about the pico is organized with tabs.
About tab
The About tab shows the pico's internal identifier (ID), its secret event channel identifier (ECI), and its name. Notice that the secret ECI "is a non revocable path into your pico and should be treated as a shared secret between the pico and any application using it in this pico's Event-Query API. Do not disclose it or check it into a repository like GitHub. Best practice is to create a new revocable ECI for every usage." Creating a new ECI is done in the Channels tab, described below.
This tab allows you to change a pico's display name, and/or color. Make changes to the text box and/or the color picker, and then send the pico the visual:update event by clicking on the button provided.
This tab also shows the parent pico if it has one. The root pico has no parent.
Next, this tab shows you a list of all of its direct children. For each child there is a link to switch from this pico to the child pico, and a link to delete the child pico. Only a parent pico is allowed to delete a child pico. If the child pico itself has children, then the delete link will not be shown. The name of each direct child pico is also shown in this list.
Finally, there is a form which you can use to manually create a direct child pico. Fill in the display name and choose a color, then send the pico the wrangler:new_child_request event by clicking on the button provided. After you do so, the UI will refresh to show the new child pico in the list of children.
Rulesets tab
This tab allows you to see and control which rulesets are installed in the pico.
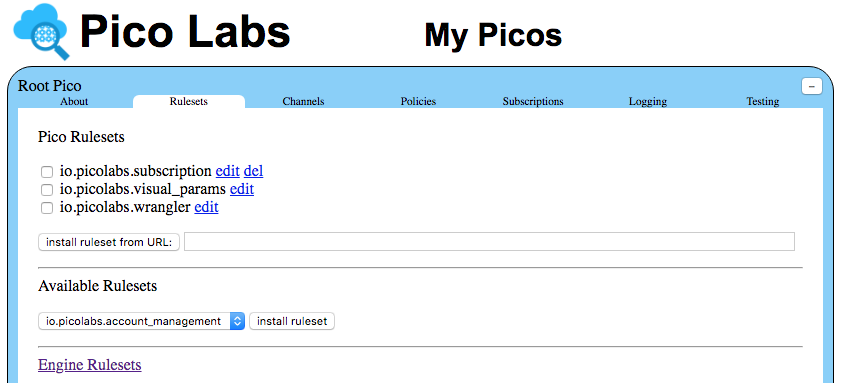
It begins with a list of the rulesets currently installed in the pico. A newly created pico will come with three rulesets installed.
io.picolabs.subscriptionwhich allows the pico to establish a two way relationship with another pico. This ruleset can be deleted if not needed.io.picolabs.visual_paramswhich allows picos to interact with the UI. This ruleset cannot be deleted.io.picolabs.wranglerwhich is a kind of operating system for the pico, described more fully in the Wrangler Operating System pages. This ruleset cannot be deleted.
A checkbox to the left of each ruleset identifier (RID) when checked will allow you to see the entity variables of this ruleset which are stored in the pico.
There is also an input box that you can use to install a ruleset from a raw KRL source code URL. In this case, if the ruleset is not already registered with the pico-engine, that will be done first, and then the ruleset will be installed in the pico.
In the next section, "Available Rulesets," there is a list of rulesets which are registered in the pico engine, but not installed in the pico. If it makes sense, you can select one of these and install it into the pico.
The final section is a link to the Engine Rulesets page, which allows you to make quick edits to any ruleset registered with the pico-engine.
Channels tab
This tab allows you to manage the channels owned by this pico.
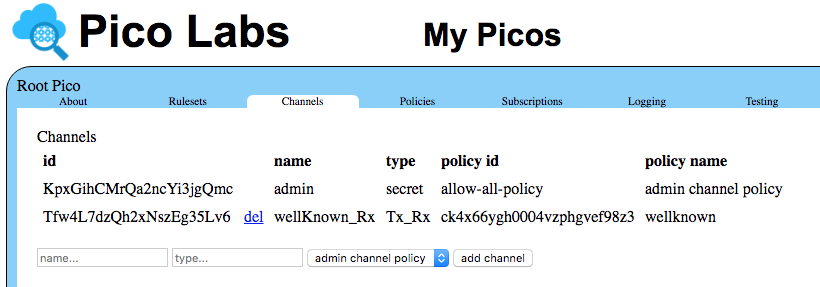
The first section shows a list of all of the pico's channels. Each channel has properties, five of which are shown in this page.
- Each channel has an identifier, which is the ECI which can be used to contact the pico.
- The name and type are used to describe the purpose of each channel.
- The policy identifier allows the developer to restrict which events and queries the channel will permit. Hovering over a policy identifier will show the details.
- Besides an identifier, each has a policy name.
Channels can be deleted (with one exception). Deletion cannot be undone, so be careful. Doing so revokes the ability of outside applications to use the ECI again.
Normally, the admin secret ECI is never used by outside applications. Instead you use the input boxes of the final section to create new channels for separate purposes.
Policies tab
This tab allows you to see all of the policies in effect in the pico-engine.

You may install a ruleset to explore these if you wish.
Subscriptions tab
The Subscriptions tab shows the list of subscriptions in which the pico participates. Checking the box shows more detail about the subscription. There is a set of input boxes on this tab to allow you to initiate subscription requests, and respond to pending subscription requests.
Logging tab
This tab allows you to see detailed logging information concerning events and queries sent to the pico within the last twelve hours.

This tab requires a ruleset to be installed in the pico. You may do this by clicking on the link.
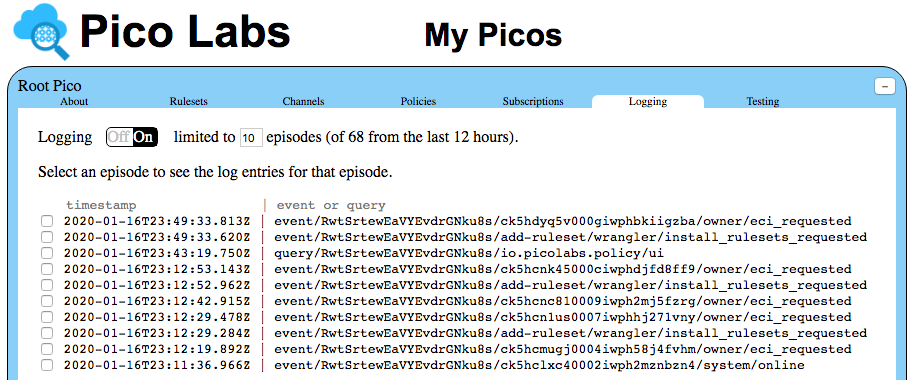
With the io.picolabs.logging ruleset installed in the pico, this tab will let you see the latest "episodes" (either events or queries) the pico has processed. Click on the checkbox to see detailed logging. To see more episodes, change the number in the box and click on the Logging tab again.
See also the Logging page.
Testing tab
The Testing tab displays a list of rulesets which are installed in the pico.
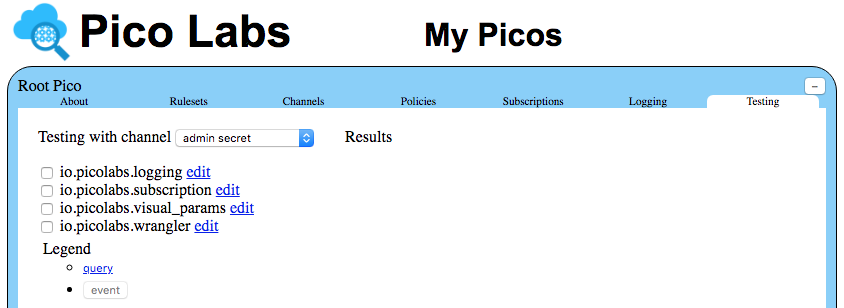
Checking the box beside a ruleset RID opens a list of forms which will permit you to supply arguments and send queries and/or events to the pico. The results of these queries and events will be displayed on the right side of the tab's display area.