Learning Objective
After completing this lesson, you will be able to:
- explain how a Pico is a first-class Internet citizen
- explain channels and use the "My Picos" page to manage them
- send events and queries to a Pico using a browser, the event console, and the "Testing" tab
- use logs
- use the klog() operator
Prerequisites
- complete the node pico-engine quickstart
- have a ruleset registered, installed in the pico-engine, and added to a Pico
- have installed the event console in Google Chrome
Pico as an Internet citizen
A Pico (quoting from Rebuilding KRL):
- is capable of receiving events and queries on Internet channels,
- interacts with other picos, even if they're hosted on another instance of the evaluator somewhere else on the Internet, and
- can call and be called from Internet-hosted APIs.
The Pico has multiple URL's that can be used to query its state and send it events. HTTP is used as its transport protocol.
events
Here is a sample URL that sends an event to a Pico like the one you created in the node pico-engine quickstart:
http://localhost:8084/sky/event/citdel5gz00012aaoo5ucc613/5/echo/hello
Breaking this URL into components:
- "http://" identifies HTTP as the protocol
- "localhost:8084" is the domain name and port of the pico-engine which hosts the Pico
- "sky/event" identifies this as an event for the Pico
- "citdel5gz00012aaoo5ucc613" is the event channel identifier (ECI)
- "5" is an arbitrary string which serves as the event identifier (EID)
- "echo" identifies the domain of the event
- "hello" identifies the type of the event
queries
Here is a sample URL that sends a query to the Pico:
http://localhost:8084/sky/cloud/citdel5gz00012aaoo5ucc613/hello_world/hello?obj=Bob
This URL shares some components with the URL above for an event. The new components are:
- "sky/cloud" identifies this as a query for the Pico
- "hello_world" is the ruleset name
- "hello" is the name of a shared function from that ruleset
- "obj" is the name of the argument that the function expects
- "Bob" is the value for that argument
Create a Channel
As you can see in the URL for events and queries, channels are the way in which a Pico can be identified by the pico-engine.
Picos can have multiple channels. The best practice is to create a channel for each purpose or correspondent. Each channel has a name and a type.
To create a new channel, visit the "Channels" tab:
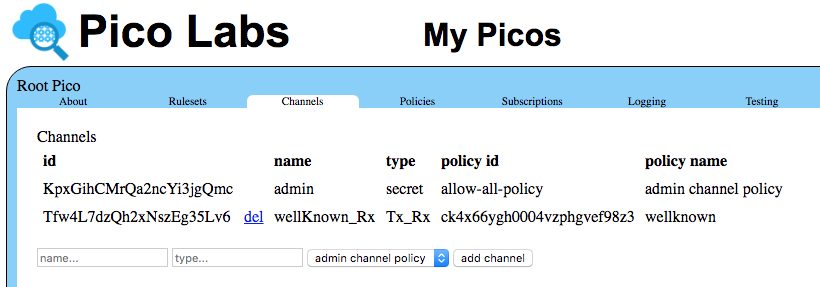
Note that the channel identifiers you will see are assigned by your pico-engine, and will differ from the ones seen in the screenshots.
Enter "lesson" in the box whose placeholder is "name" and "temporary" in the box whose placeholder is "type" and click the "add channel" button to create a new channel.
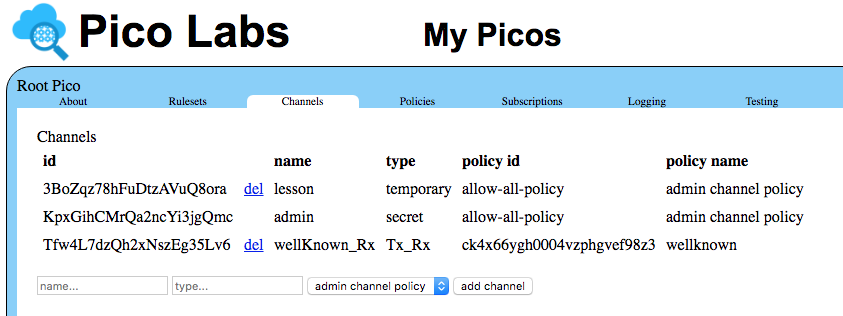
Note that you are able to delete channels that you create.
Make a note of the channel identifier assigned to your temporary channel. You will be using this "lesson" channel throughout the rest of this lesson.
Congratulations! You have created your first channel.
Sending events through the channel
Since a Pico is a first-class Internet citizen, there are many ways in which you can send it an event.
Directly using a URL
Construct a URL that identifies your Pico by the channel id that you created in the previous section. Remember to replace the channel identifier in the sample URL with the identifier of your "lesson" channel. Also, you may choose your own event identifier (rather than use "5").
You can use the URL in any Internet client. For example, you could use the `curl` command.
Here we will use a tab in the browser. Place the URL in the location area of your browser, and press the Enter key.
The result will look something like this:

Using the event console
to do
Using the "Testing" tab
While developing a ruleset, you can use the "My Picos" page which can provide a simple UI for your event. To do so, you must modify the ruleset to define and share the name "__testing" and bind it to a structure which represents the events and queries you wish to test.
Modify your ruleset to look like this:
    shares hello, __testing
  }

  global {
    hello = function(obj) {
      msg = "Hello " + obj;
      msg
    }

    __testing = { "queries": [ { "name": "hello", "args": [ "obj" ] },
                               { "name": "__testing" } ],
                  "events": [ { "domain": "echo", "type": "hello" } ]
                }
  }

  rule hello_world {
    select when echo hello
Notice that we have added a new name "__testing" (double underscore) to the "global" section of the ruleset.
This name must also be shared, so we add it to the "shares" entry in the "meta" section of the ruleset. The "shares" keyword is followed by a comma-separated list of names defined in the globals section which we wish to use outside of the ruleset. Those names not mentioned in "shares" are for the private use of the the ruleset and are not exposed to other rulesets.
The value bound to "__testing" is a structure that describes those portions of our ruleset that we wish to expose in the "Testing" tab. You do not need to expose every aspect of your ruleset, but only those that you wish to appear in the "Testing" tab.
Be sure to use the "validate" button to make sure there are no syntax errors in your ruleset. Once you get the "ok" go ahead and register, enable, and install your modified ruleset. (Review the node pico-engine quickstart page if necessary)
Refresh your "My Picos" page, and click on the "Testing" tab.

Notice the button "echo/hello", representing this event for your ruleset named "hello_world". Click on this button to send the event.

Using logs
Look at the console from which you started your pico-engine.
You should see entries like this one:
[DEBUG] event { event:
   { eci: 'citdel5gz00012aaoo5ucc613',
     eid: '5',
     domain: 'echo',
     type: 'hello',
     attrs: {},
     timestamp: '2016-09-22T16:03:42.797Z' },
  pico_id: 'citdel5gm00002aaos8jbbe6n',
  rid: 'hello_world',
  rule_name: 'hello_world' } fired
You may find this information useful in debugging events.
For example, try a typo in the URL for the event, say by spelling "echo" incorrectly as "ecco". In the console log, you will see that the event is recieved, and the Pico selected (based on its ECI), but you will not see that the event has fired.
Send a query through your channel
Create a URL for your Pico which uses your "lesson" channel identifier. It will look something like
http://localhost:8084/sky/cloud/citeh9si400022aao04assjxy/hello_world/hello?obj=Bob
Places where yours will differ from the one above:
- you may be using a different port (other than "8084")
- you will be using a different channel identifier (not "citeh9si400022aao04assjxy")
- you may be using a different value for the expected argument named "obj" (not "Bob")
You can also enter the value for the argument in the "Testing" tab, in the box whose placeholder is "obj", and click on the link "hello".

Congratulations! You know how to send queries to a Pico.
More about logs
KRL provides an operator, klog(), which allows us to print information into the log file. It is an operator, rather than a statement, so it is applied to an expression. It prints into the log the message passed to it as an argument, followed by the value of the expression on which it operates.
As an example, we will modify your "hello_world" rule to expect an attribute, named "name" and use it to customize the message returned in the directive.
Modify your rule so that it looks like this:
  rule hello_world {
    select when echo hello
    pre {
      name = event:attr("name").klog("our passed in Name:")
    }
    send_directive("say") with
      something = "Hello " + name
  }
This is the first use in these lessons of a prelude block within a rule. This is where we bind values to names which can then be used within the rule. Here, we obtain the value of an event attribute named "name" and bind that value to a name which is also named "name". We apply the "klog" operator to that value, which simply passes the value along, but as a side-effect logs its argument followed by the value.
Let's also modify the structure bound to "__testing", as follows:
    __testing = { "queries": [ { "name": "hello", "args": [ "obj" ] },
                               { "name": "__testing" } ],
                  "events": [ { "domain": "echo", "type": "hello",
                                "attrs": [ "name" ] } ]
                }
With these changes, we can now enter a value into the box whose placeholder is "name" before clicking on the "echo/hello" button to send the event.
The console of your web server should now show this a message like this:
[KLOG] our passed in Name: Bob
Congratulations!
You now know how to send events to and make queries of a Pico. You have also learned some debugging techniques.
Next, learn about persistence, the "P" of Pico, by working through Lesson 2. Pico state.